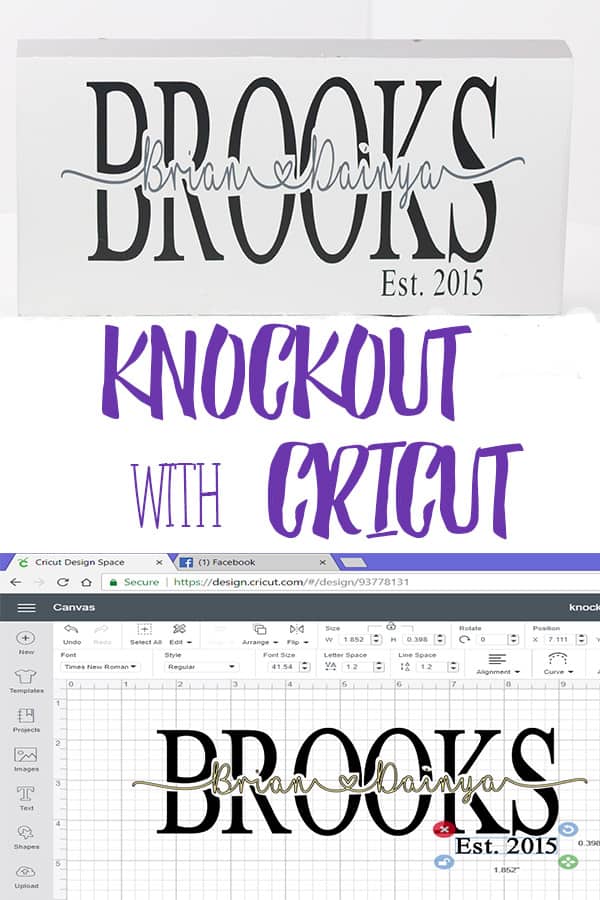
Knockout with Cricut
A step by step guide how
to create a last name
knockout image. In a
short amount of time
you can create a custom
gift perfect for any couple.
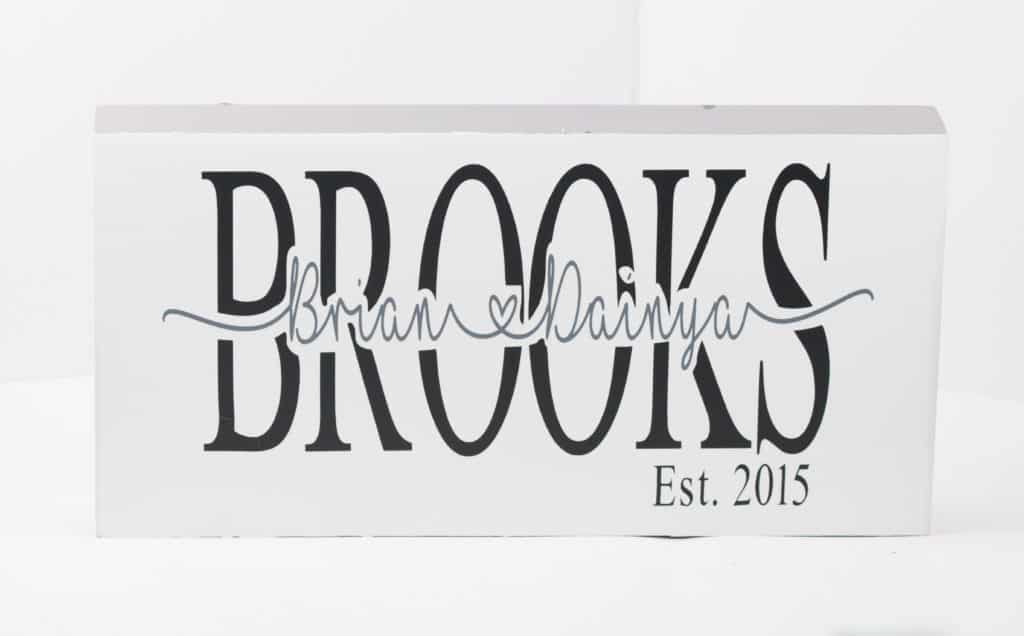
So there has been a craze with this knockout image thing. People are going crazy making signs for couples to hang in their home. A perfect wedding, anniversary, or housewarming gift in my opinion.
I have seen people using them for mothers day gifts as well using mom as the background with their childrens names as the smaller font.
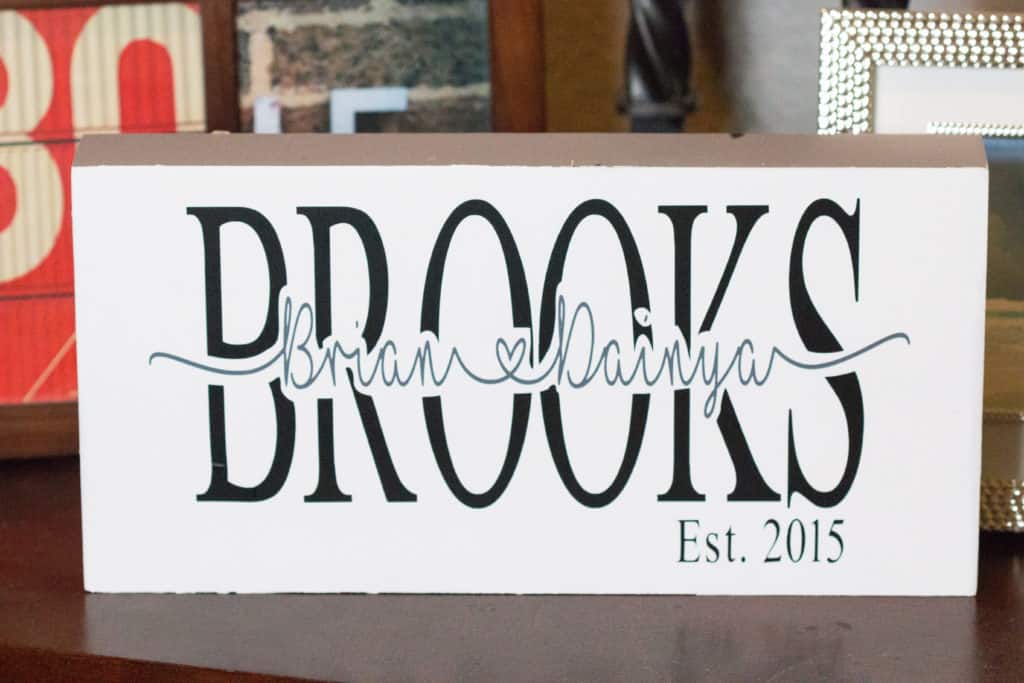
Either way you can customize it however you like and have the perfect gift. Or like in this tutorial to make for yourself to hang in your home for all to see.
I will give a step by step guide including pictures of how to achieve this knockout image.
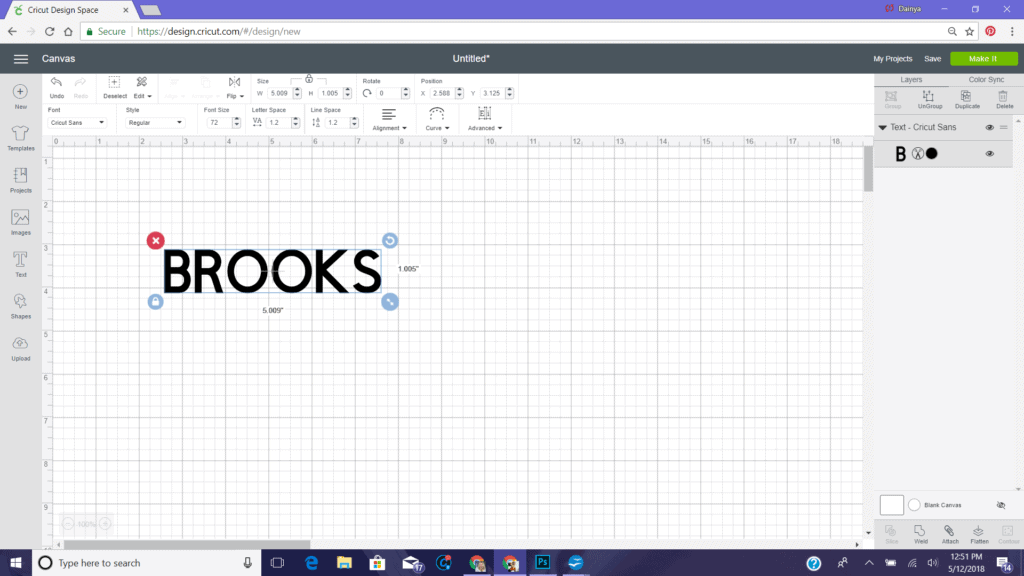
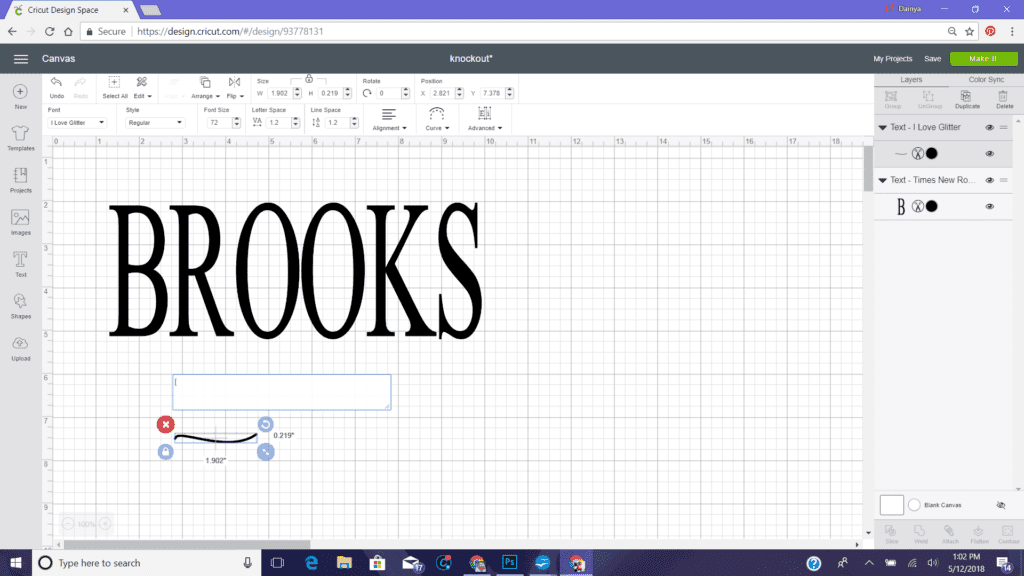
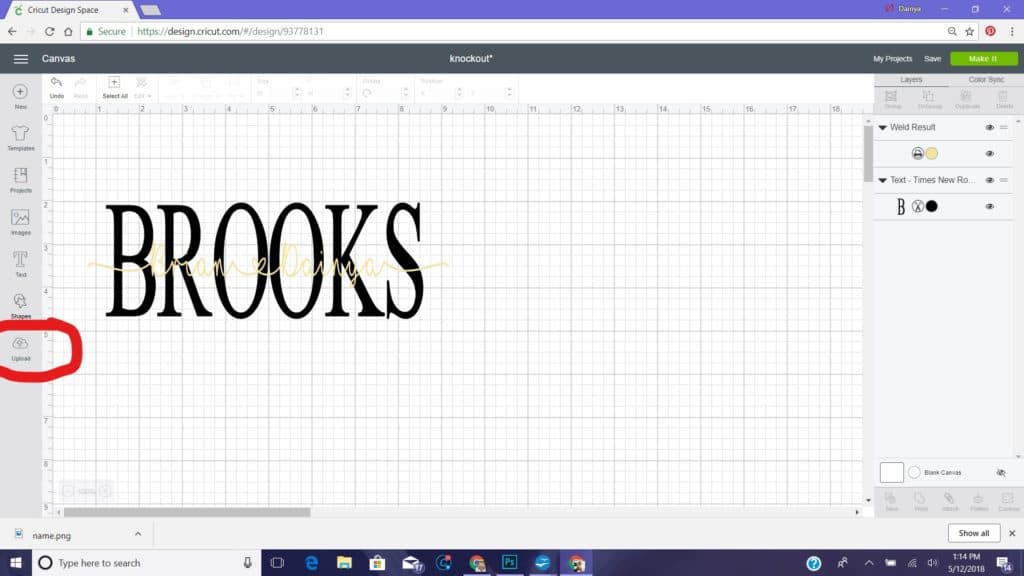
First open a new project in design space and open a text box and type in the last name in all caps.
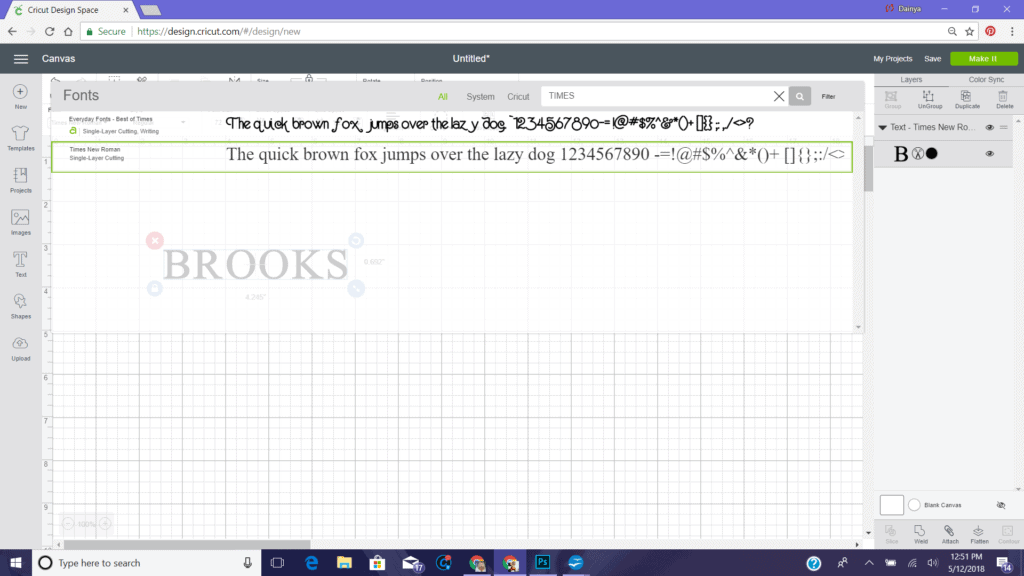
Then go up to fonts and pick a font you like. I went with Times New Roman.
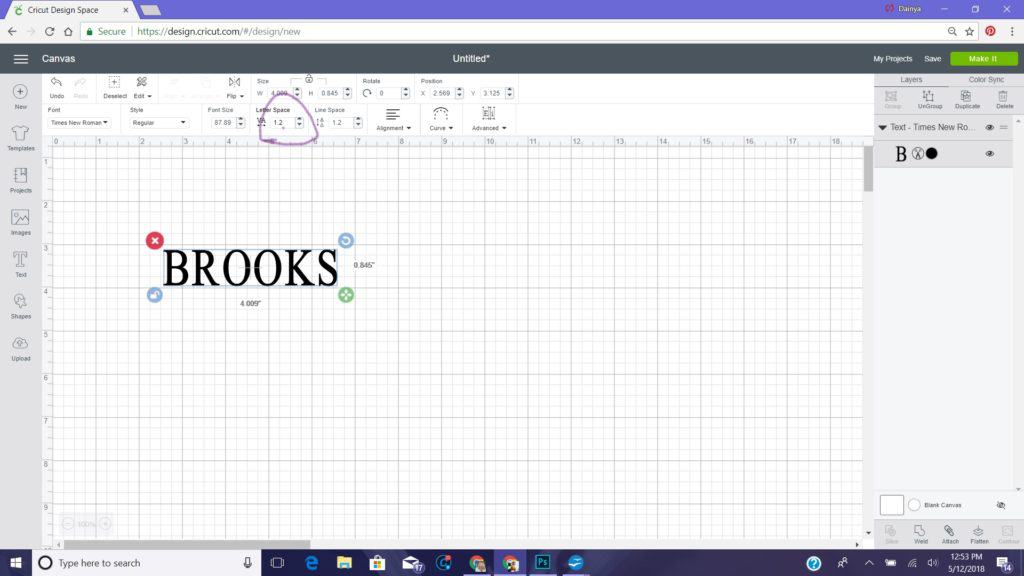
You want to go up to letter spacing and decrease the letter spacing so the letters move closer together. You don’t want them touching, but close.
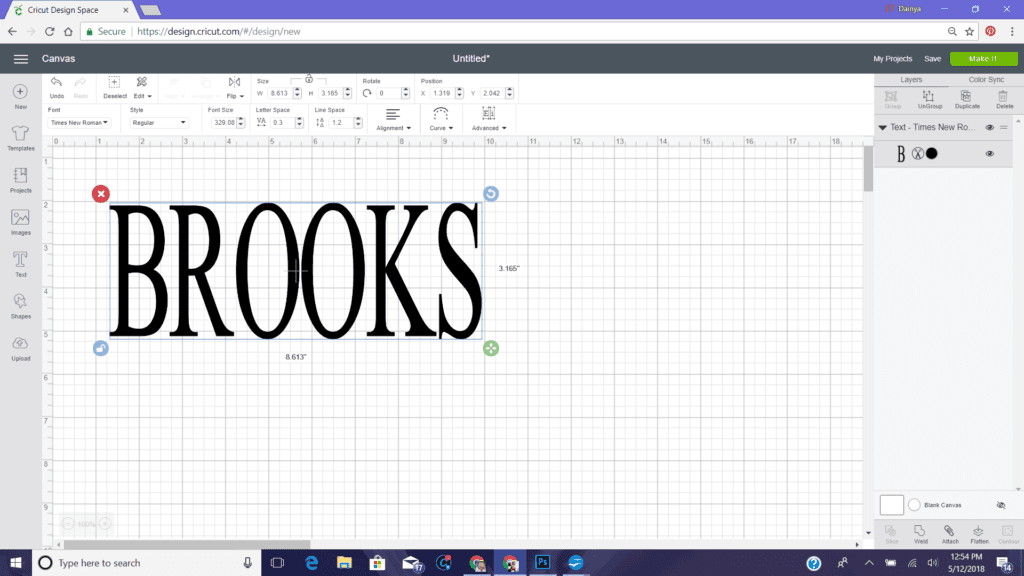
Then go to your text box and press on the lock button in the bottom right hand corner. This will let you re-size both the height and width to whatever you want. Re-size to whatever size you want your image to be on your project.
Next open another text box and go up to the font and select the I love glitter font. If you don’t already have this font go to https://www.dafont.com/search.php?q=i+love+glitter and download the font.
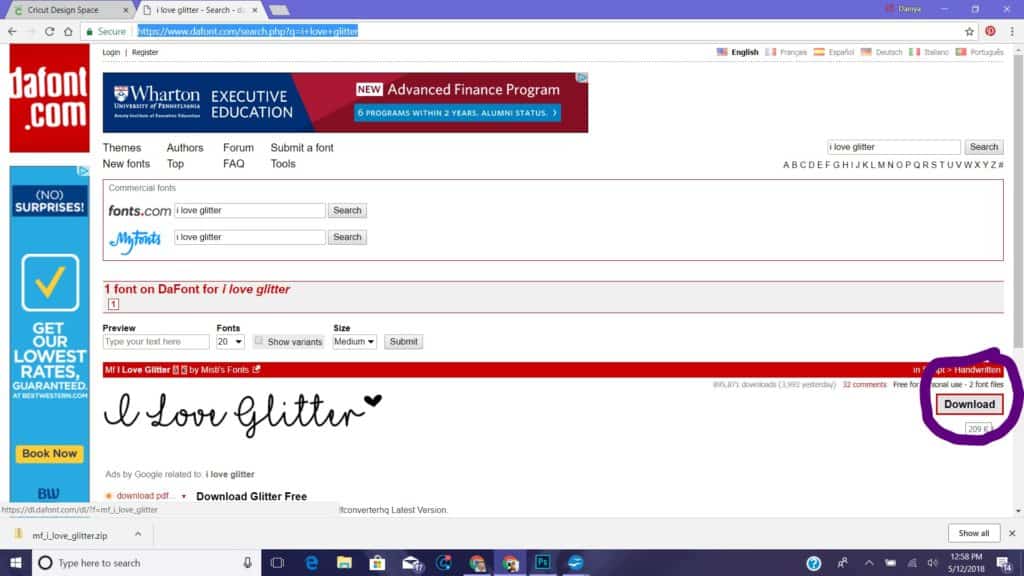
To download press the download button.
A pop-up will be at the bottom of your screen on your taskbar, open it.
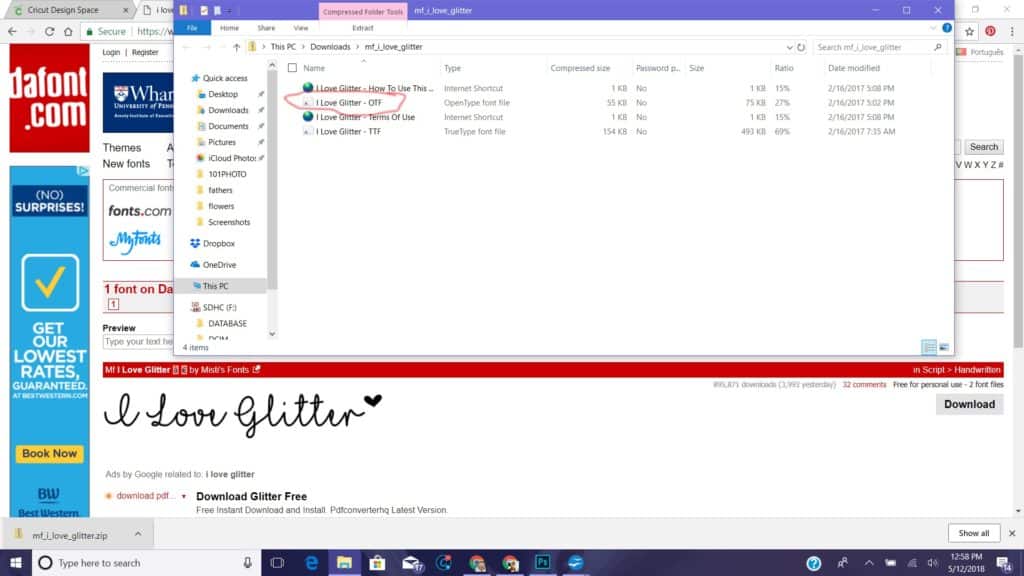
Then click on the second file name.
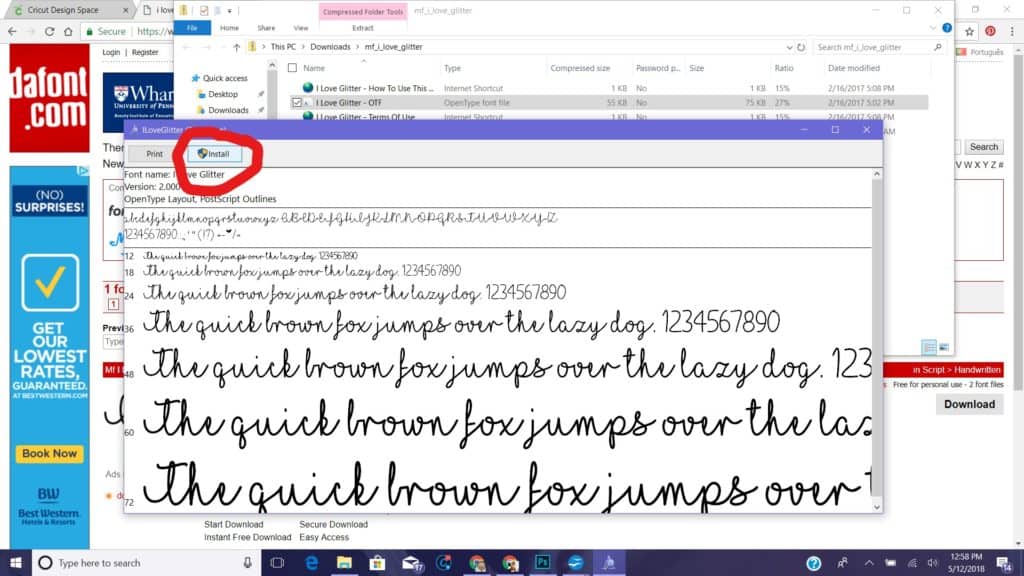
Then click on install.
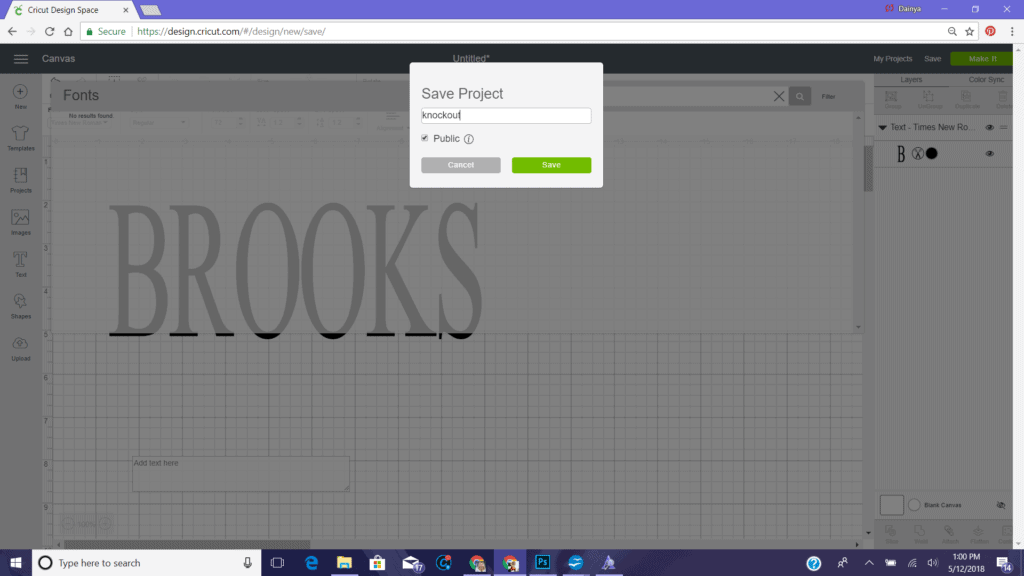
After doing all this you will need to save your project and completely close design space and reopen it and your project. If you don’t do this your font will not show up.
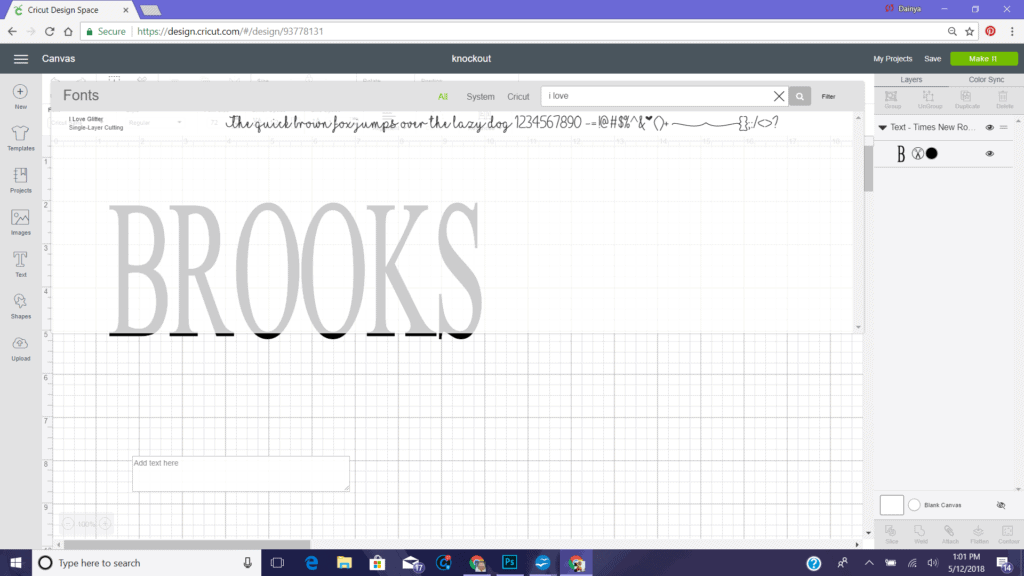
After opening up your project again create a new text box and go up to fonts and change to I love glitter font.
Then you want to type in the open bracket and then the first name.
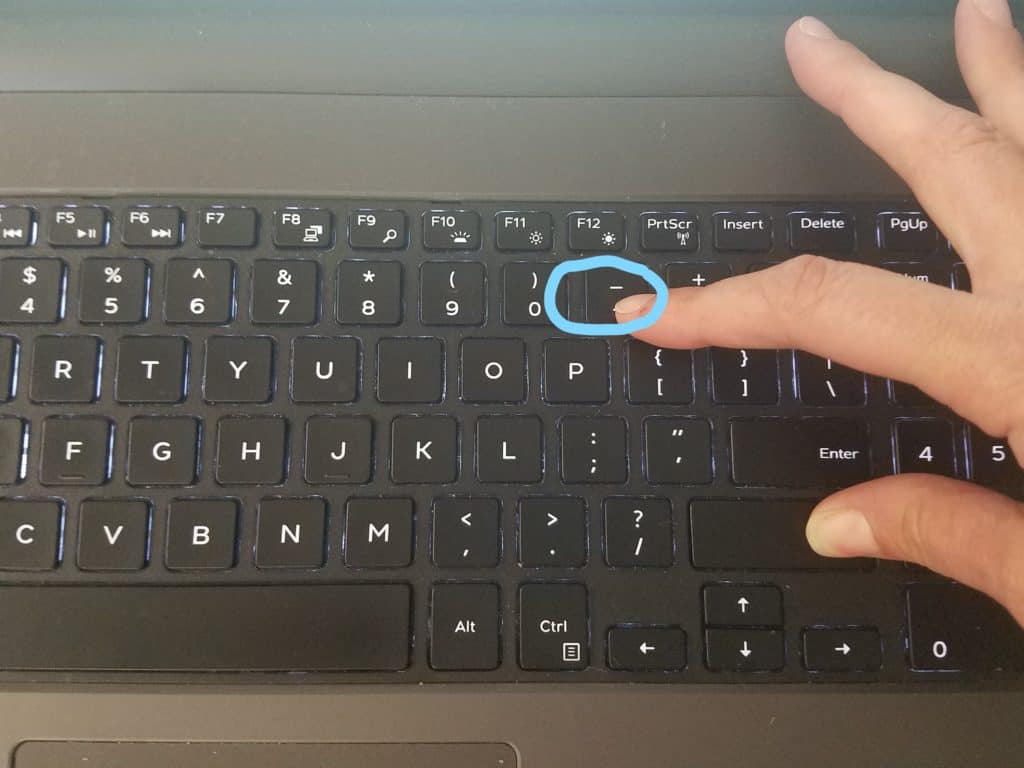
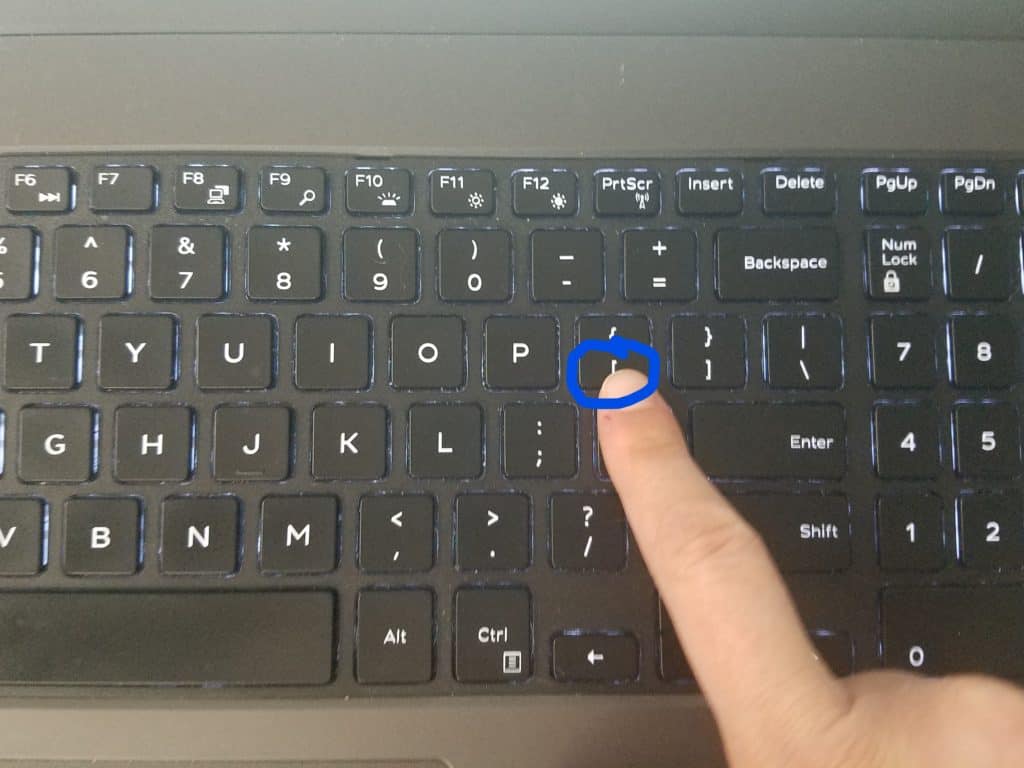
Hold down the shift button and the dash button to create the heart and then the second name.
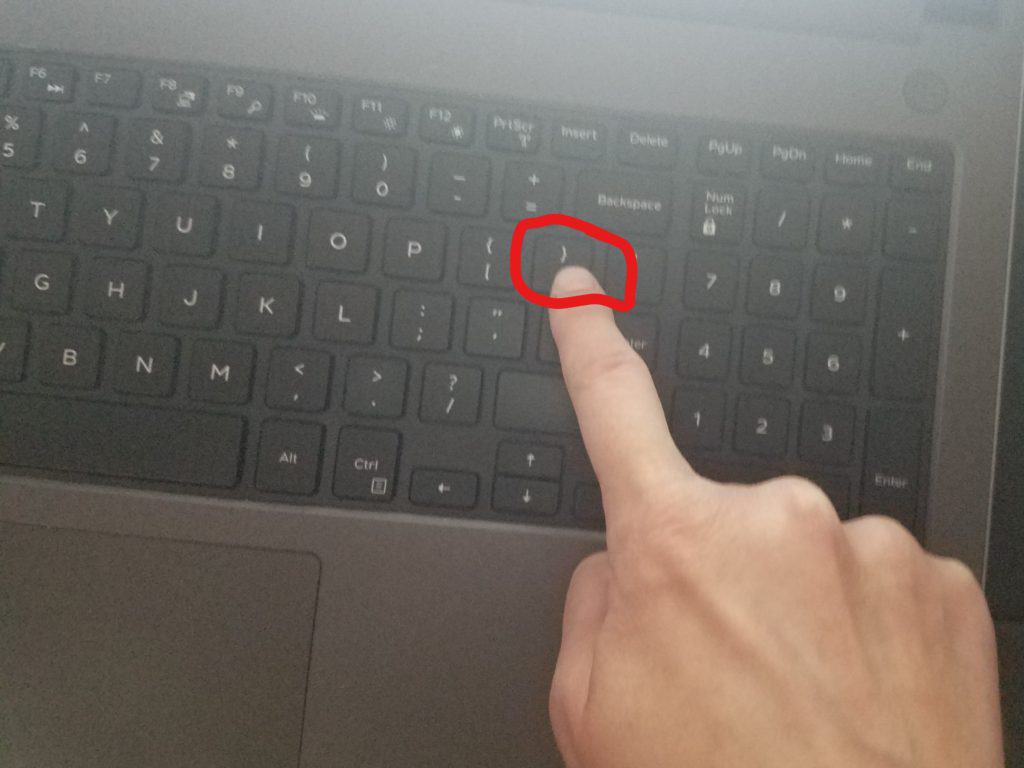
After the second name type the close bracket.
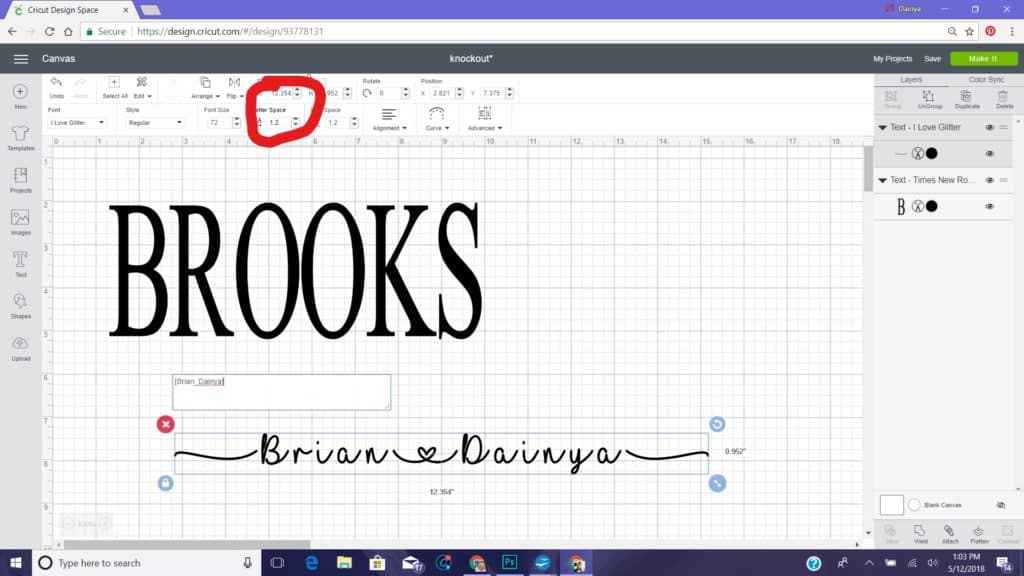
Then go up to the letter spacing and decrease the size to wear all the letters and sashes are all touching.
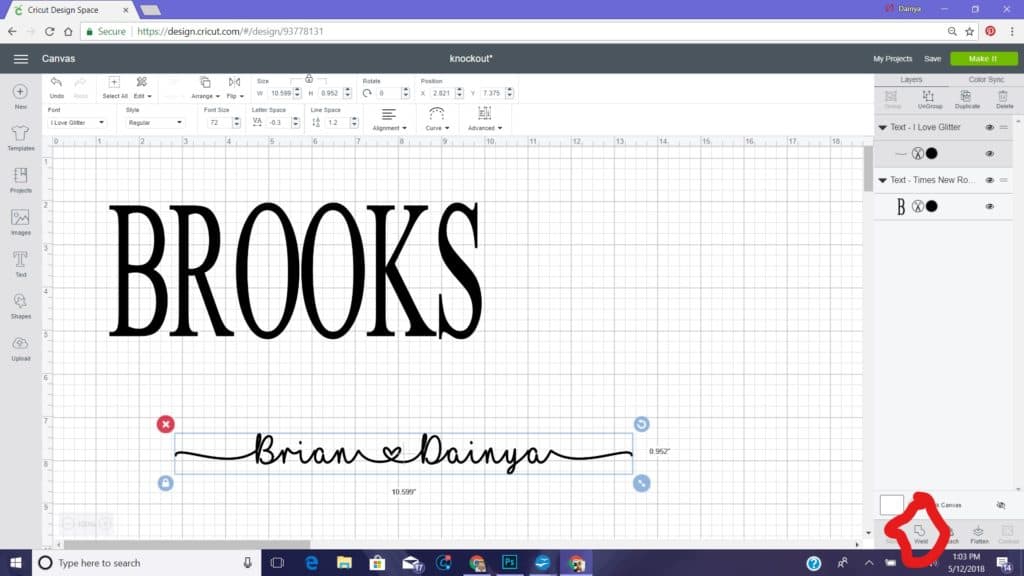
This is one of the most important parts go over to the bottom right hand side of your screen and press the weld button.
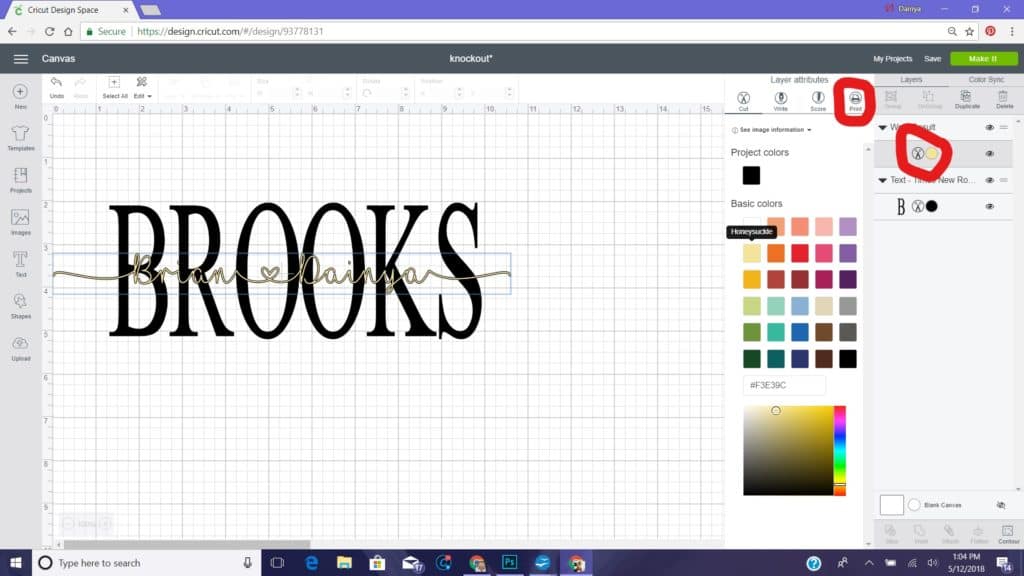
I like to go up to the top right hand of the screen and on the names we just type change the color to a brighter color so I can see it better.
Then go back over to the right top side of the screen and make the first letters print instead of cut. You aren’t really printing it, but this is a step you have to do.
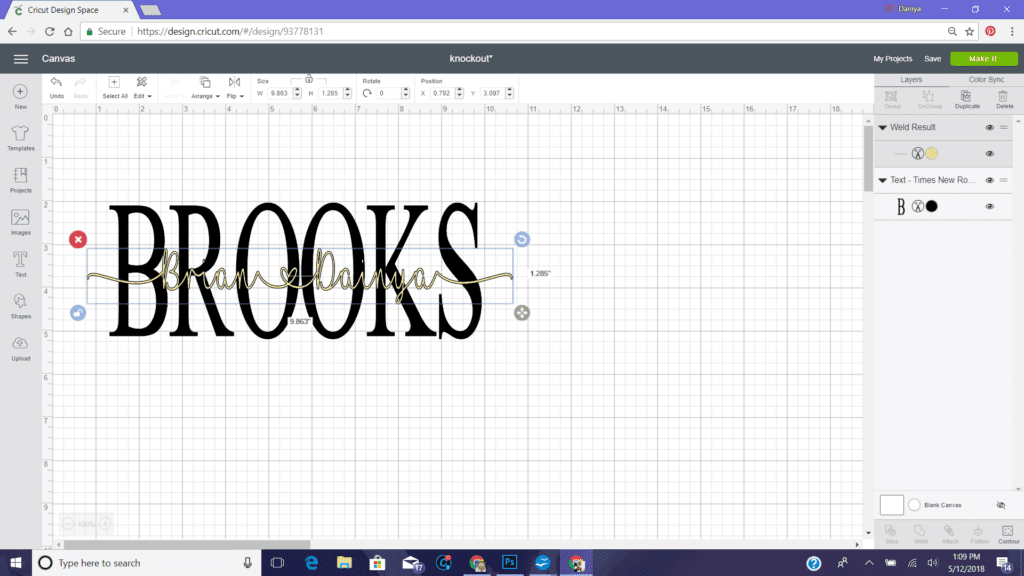
After that click on the lock button of the text box and re size to the size that looks best with the last name.
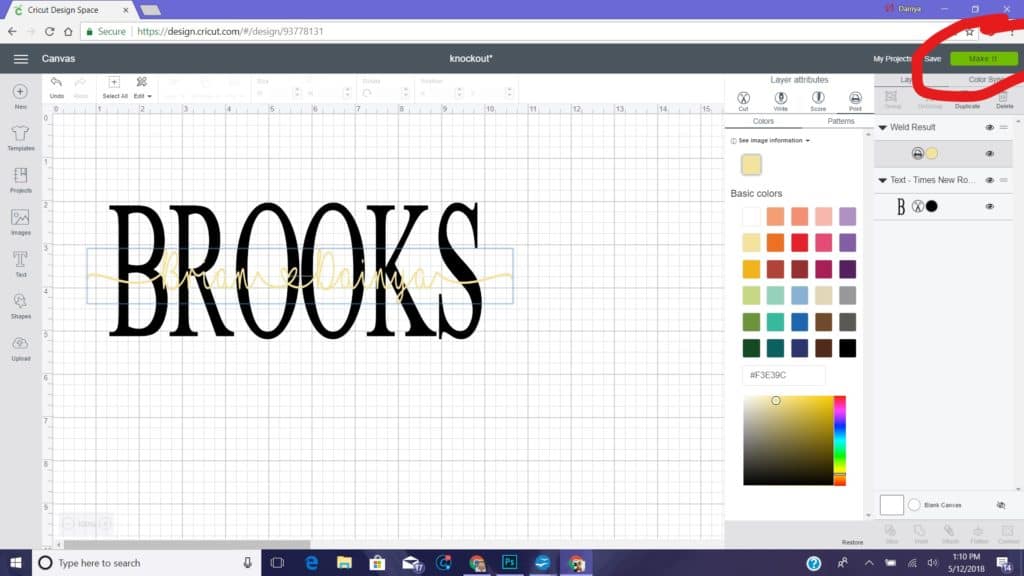

Go to make it and then click continue.
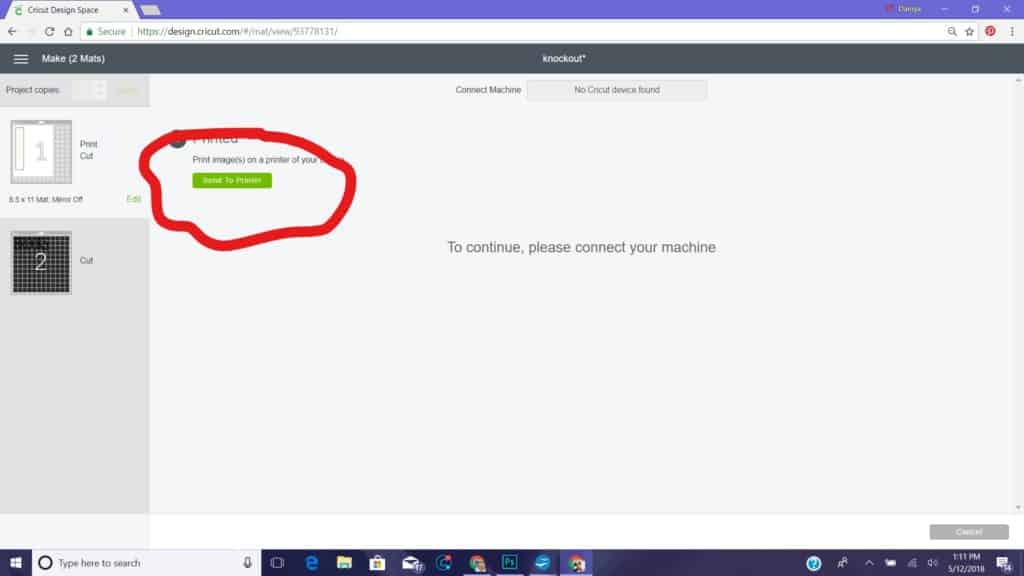
Go up to send to printer.
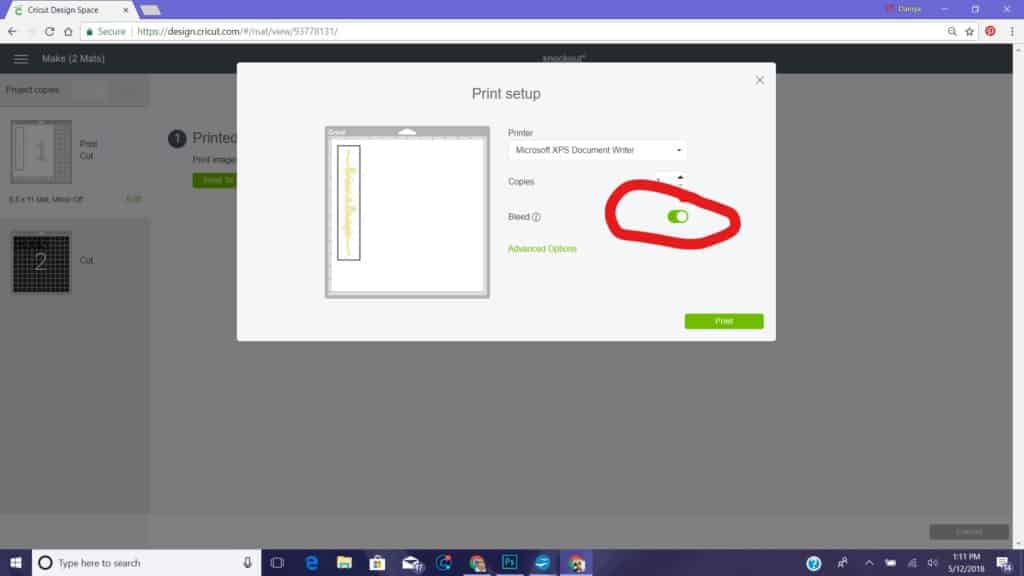
Make sure the bleed is on. It is automatically on bleed, but just make sure.
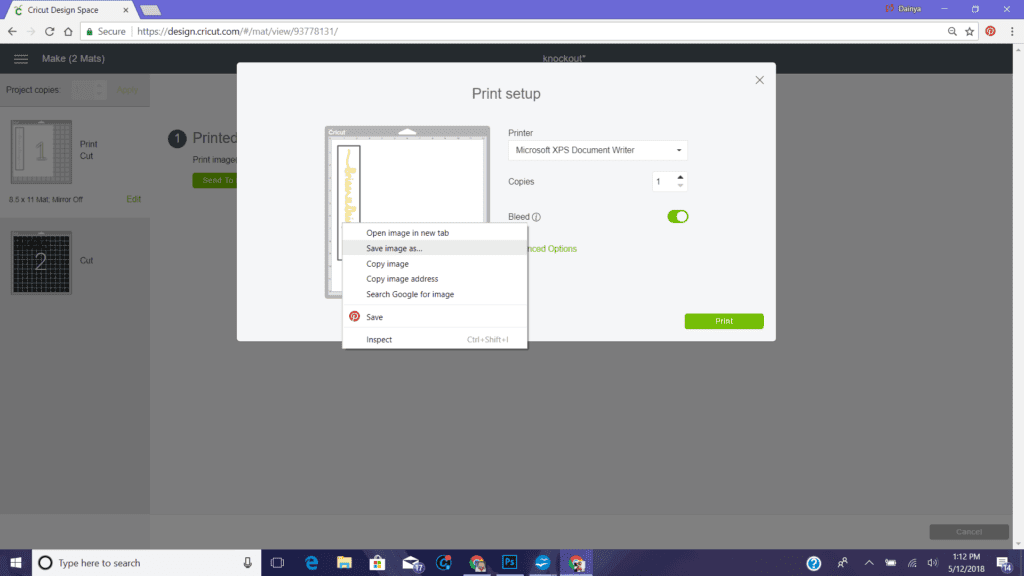
Next right click on the image and click save image as.
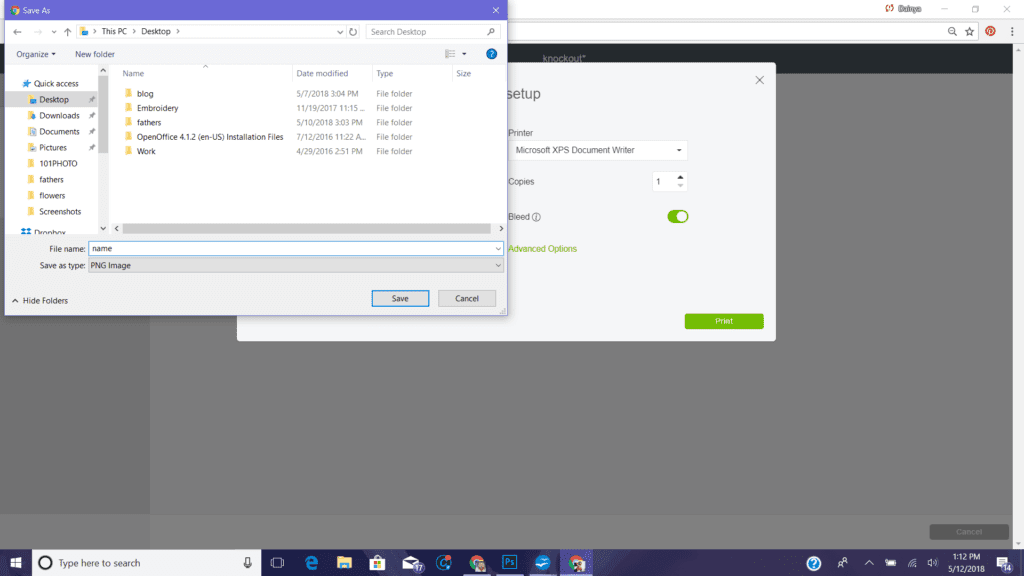

Save the image where you can easily find it. Then just x out of the printing and press cancel on finishing the project.
Now go to upload on the left side of the screen.
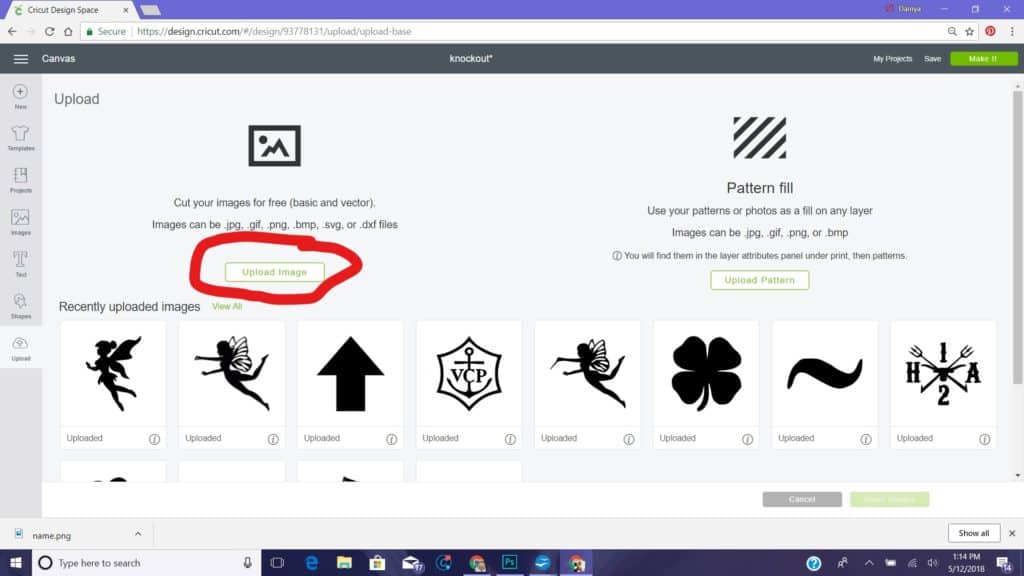
Now press upload image and click browse and search your file.
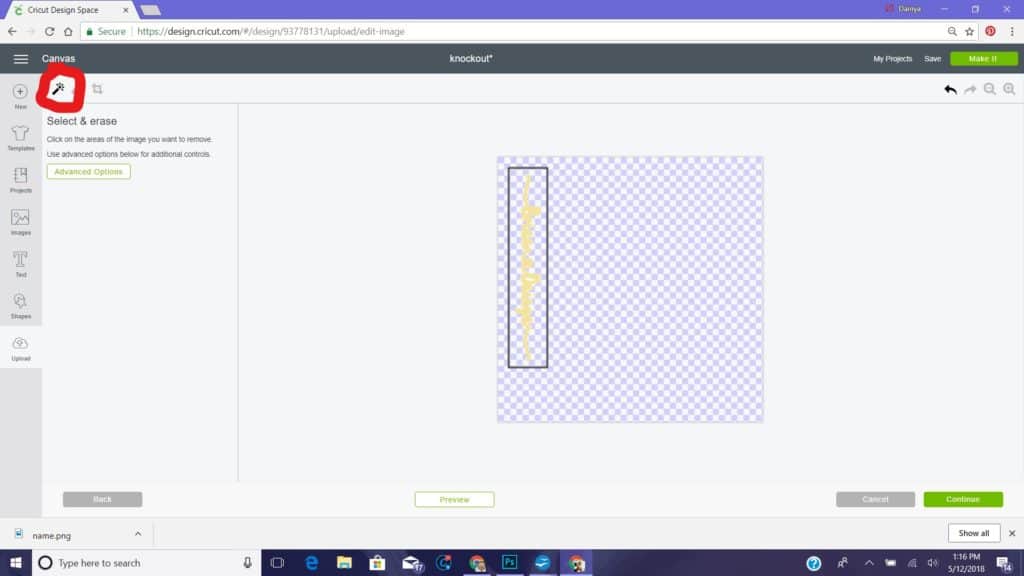
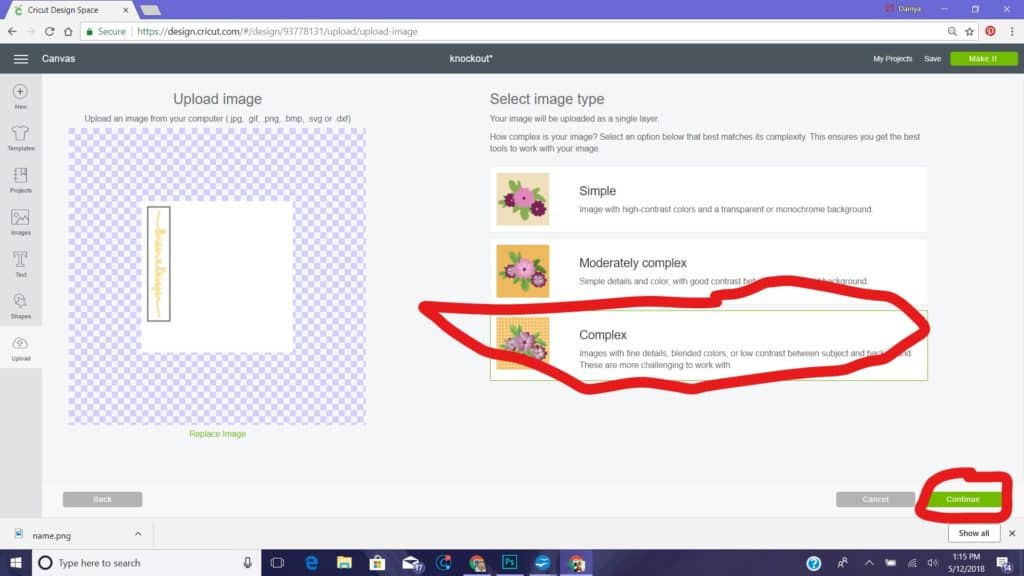
Now press complex and clean up the image by using the eraser wand and get rid of the box and any areas that aren’t the text. Then press continue and save as a cut.
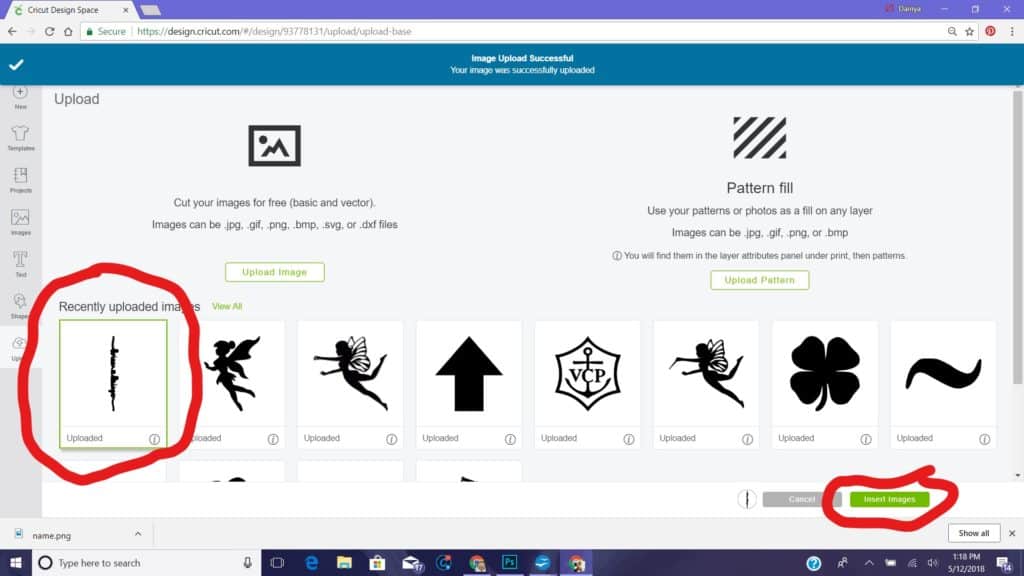
Highlight the image you just created and insert image.
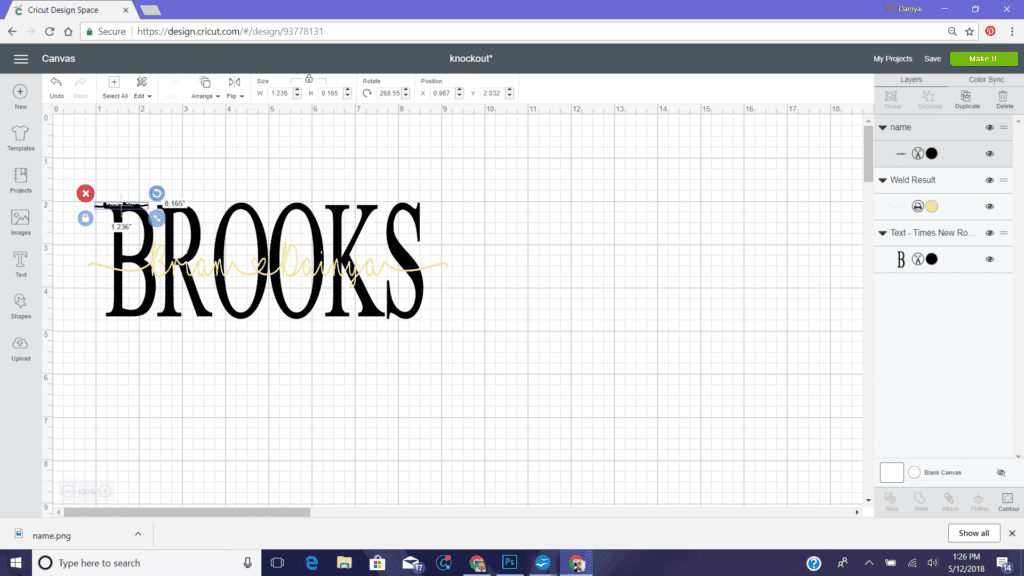
Re position the image to where it is horizontal and not vertical.
Then re-size it. I had to press the lock button so I could change the size but vertical and horizontal.

Move the original names over to the side. You can also change that back to cut and not print anymore.
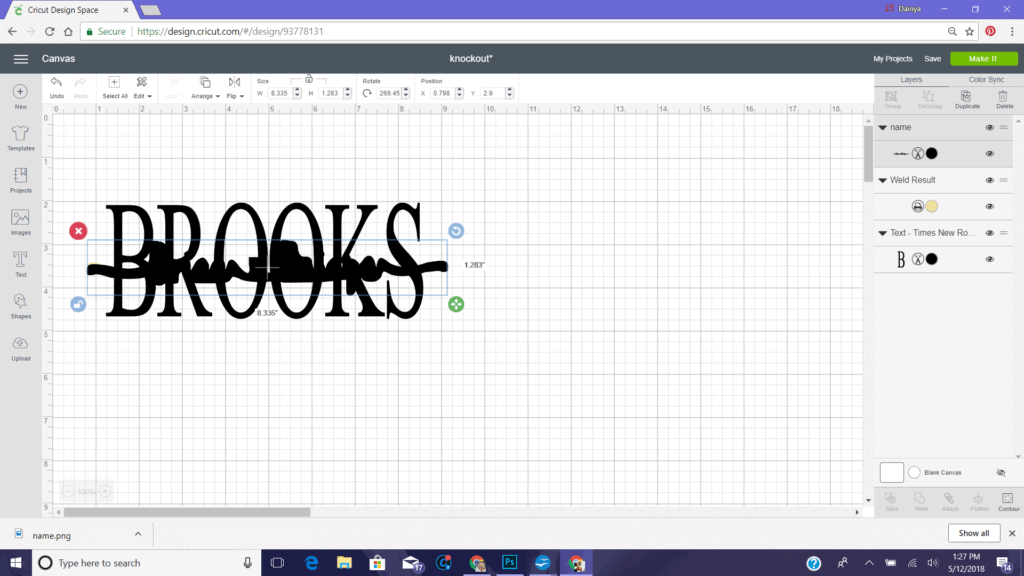
Now select the outline image and also the last name by clicking one and holding the control button down and click on the other. Once they are both highlighted go over to the bottom right hand side of your screen and click the slice button.
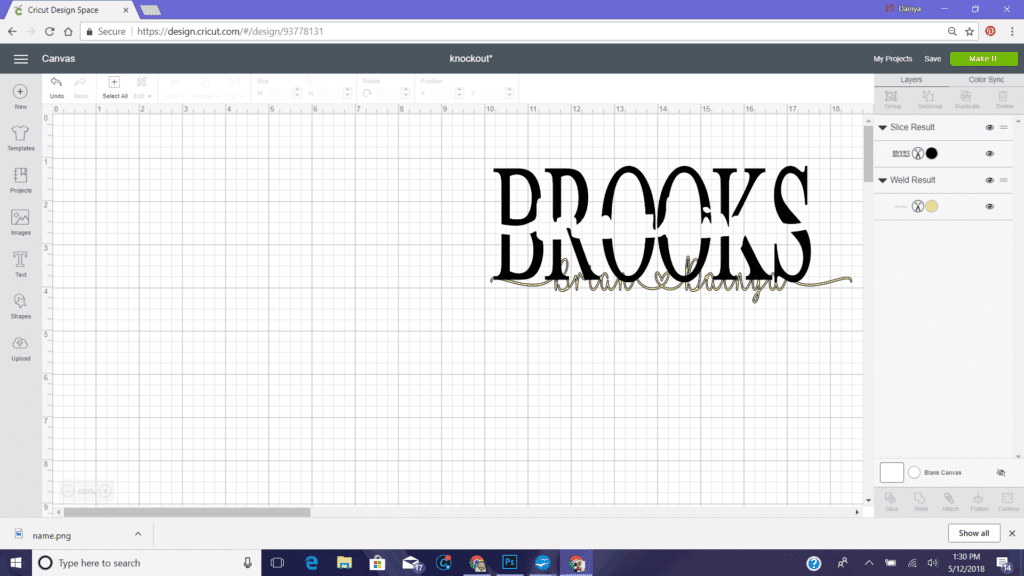
Move the last name over to the side and delete the other layers of the slice.

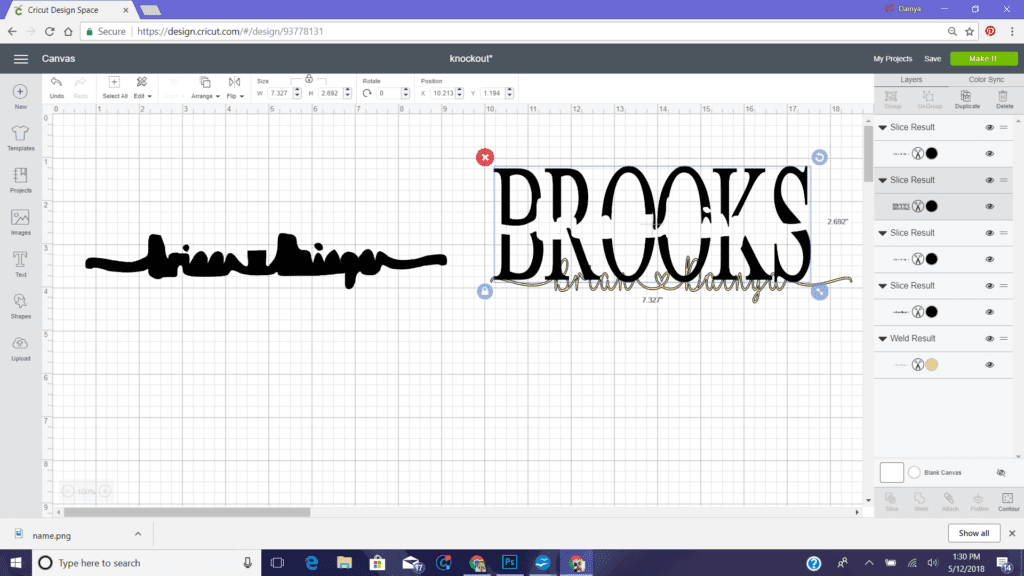
Now move your last name back and then line up the first names inside.
You might want to re-size the first names a little or it could be just how to like it and that is it.
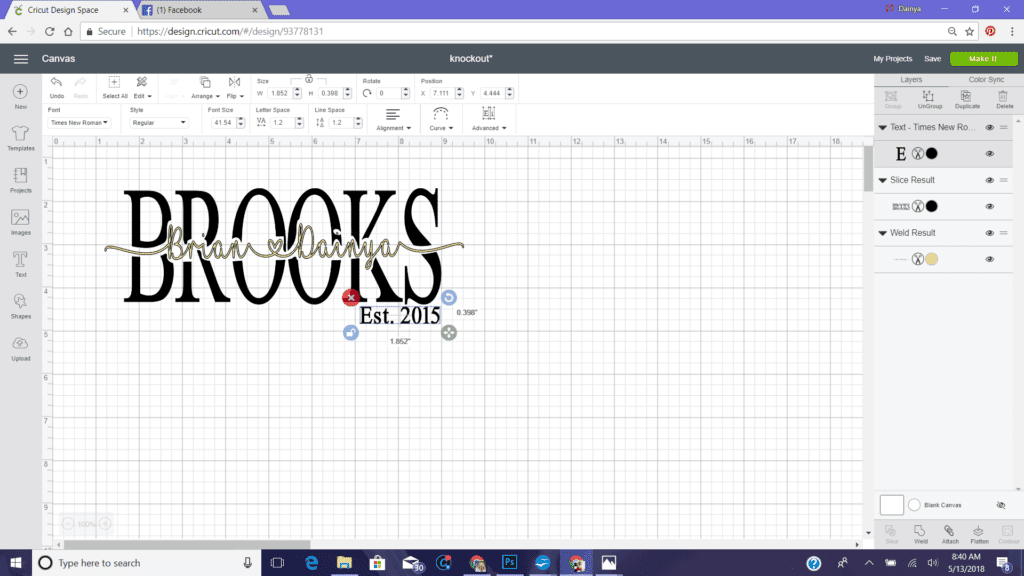
I’m also going to add a since date. You can do this as well or not.
If you are making an image with sticker vinyl just cut as normal, but if you are making an image with heat transfer vinyl such as a shirt mirror the images.
Muchas Gracias! Excelente tutorial
Thank you
I downloaded the font but it doesn’t show up in design space.
After downloading it you have to completely close out design space. After it is closer reopen it and then your fonts should be there. Common mistake
I’ve tried this 5-6 times now with different tutorials and I get the same result every time. Slice and weld are not options. they are greyed out. What am I doing wrong ??
Are you making sure both are highlighted as in your objects? By clicking on one and holding down the control button then clicking on the other?
On my cricut design space, after doing all steps up to the end. It does not give me an option to change my names to “print” instead of cut. Only options I have is “draw,cut,score” Can I do this knockout without changing to print? I tried saving it like you said but not the same
Right next to where you can choose draw, cut, score is the fill box. In that box you can pick print
I’m trying to save my image by right clicking and it won’t let me save as a png, only a text file. Any help?
So Cricut Design Space just did some updates and now everyone seems to be having the problem where it only saves as a text image. I’m going to keep looking and see if anyone has a solution to the problem or if Cricut has fixed it themselves.
I have a mac but all i had to do was click and drag the image to my desktop and then drag it back on upload image
Did u find a solution to the problem with the image saving as a text or did cricut fix it because I’m still have the same thing happening to me thanks in advance
No I haven’t and i even asked some groups. The only thing i have found us people using other programs until cricut changes things. So sorry. I’ll look more when i get back from vacation
after i save the cut image, the image doesn’t seem to be girth-y enough. the bleed is on. also, my text barely aligns, making it hard to read. what am i doing wrong? help! please and thank you
Can you write me on facebook or instagram so I can see a picture?
Every time I try to save the image it says cricut doesn’t support it.. how else can I make this design… ? I’m new to cricut but love this !!
Cricut changed something in their system and now this method doesn’t work or at least on PC. I’ve been waiting for them to update but nothing has happened yet.
FINALLY! This is the absolute best tutorial on this subject! I have watched and researched many. This one is by far the most detailed and simple! Thank you so much!
Did you get it to work because design space changed something where this method wouldn’t work, but I haven’t checked if they changed it back recently
I was wondering if anyone was able to figure out how to save it. I have been unsuccessful getting it to save. Any info would be greatly appreciated.
I haven’t tried in awhile, but I’m guessing nothing has change because I haven’t seen anything in the cricut groups I’m in. Still hoping a new update will go back to the way it was
Thank you! It seems to work for windows computers and the Cricut Explore and Maker. I have a Mac and couldn’t figure how to save the print image. Otherwise worked fine till that point. ?
Hello thank you for this amazing step-by-step. Could you please help me understand why my bracket doesn’t produce a flourish. Is there something else I need to do. When I press the bracket it gives me exactly that a bracket and the short cut for the heart as well. Is there something else I need to download?
Please help or suggest
April
Were you referring to downloading fonts with tails? Because this post is about knockout
Thank you for this tutorial. Bummed Cricut still wont allow me to save the image. But still good to know just in case something changes.
I know i am bummed too. There are other ways to do it but it has become complicated
I also had issues with design space allowing me to save once I had gotten into the area where I’d indicate my printer. I was able to select print to pdf and then use a free online service to convert the pdf to an svg…that may be a not so complicated workaround for folks still wanting to make projects like this!
It’s March 2021. This is the first time I have ever seen this site. I have to say, VERY WELL EXPLAINED!!! I have seen a few different ways to do this and it’s very complicated and hard. I had figured this one out as I was learning many new things every day. I’m a Graphic Designer so, it wasn’t too bad. I know what type of things to look for. You did an awesome job at explaining the Knockout Method and anyone who wants to learn how to do this should really see these instructions. Thank you for sharing.
Hi, I am following your steps on this project. I get to where I am suppposed to save the image. However, I am not able to save the image. I have the cricut explore air 2. Now what do I do? Any help is greatly appreciated. Thank you so much!
Nancy U.
You are welcome. Enjoy
How do you make your font thick before you slice it? The image that I slice is very thin and there isn’t much space to add the name so it’s visible.