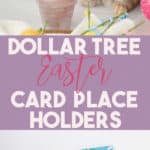
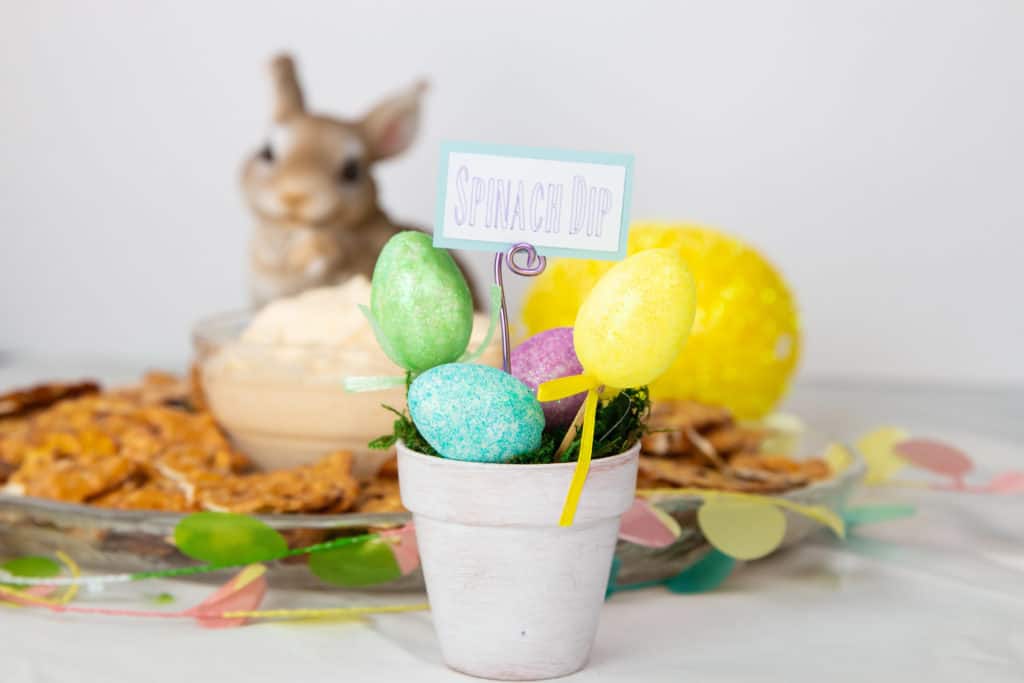
Dollar Tree Easter Place Card Holders
Make these adorable Dollar Tree Easter Place Card Holders with supplies you can get at Dollar Tree. Perfect for adding a cute touch to your Easter table.
There is nothing more fun (in my opinion) than doing crafts. And what I love more than doing crafts is getting the supplies for cheap.
In this tutorial all the supplies that are needed you can pick up at your local Dollar Tree. Which means EVERYTHING is only a $1. So for this project you are getting 6 Dollar Tree Easter place card holders for a little over a $1 a piece. These usually run you $3 and up if buying from a store.

What can these be used for?
Well there is the obvious of using these as name place card holders to designate where everyone will be siting at the dinner table on Easter.
But you can also use these if you are doing a buffet style Easter dinner and want to label certain food items that aren’t obvious what they are. That is what I will be using them as this year since I already made other name place holders.
If you don’t need either you could also just add cute little sayings in place of a name and set as table decor. Or skip the floral wire part and just use them as decor.

Supplies you will need:
- Mini Terra Cotta Clay Pots– I got 2 sets of 3 for this project. These can be found in the garden section of DT
- Floral Moss– one bag will be more than enough.
- Floral Wire– get the thick kind. I believe they come in 4 different colors. I went with purple to stay with the color scheme
- Egg Picks– You want to get the smaller ones with 10 in a bag
- Foam Eggs– I got the ones that matched the Egg Picks
- Acrylic Paint– I picked up this tube I found at DT, but if you already have some paint at home you can go with that
- Sponge Brush– if you don’t already have some DT has these as well.
- Hot Glue Gun and extra sticks– While you can’t get the glue gun at DT you can get extra glue sticks. I used about 4 for this project
- Extras– wire cutters or something to cut the wire. It is a softer wire so scissors would work. Needle noise pliers, not necessary, but helpful
Painting the Clay Pots
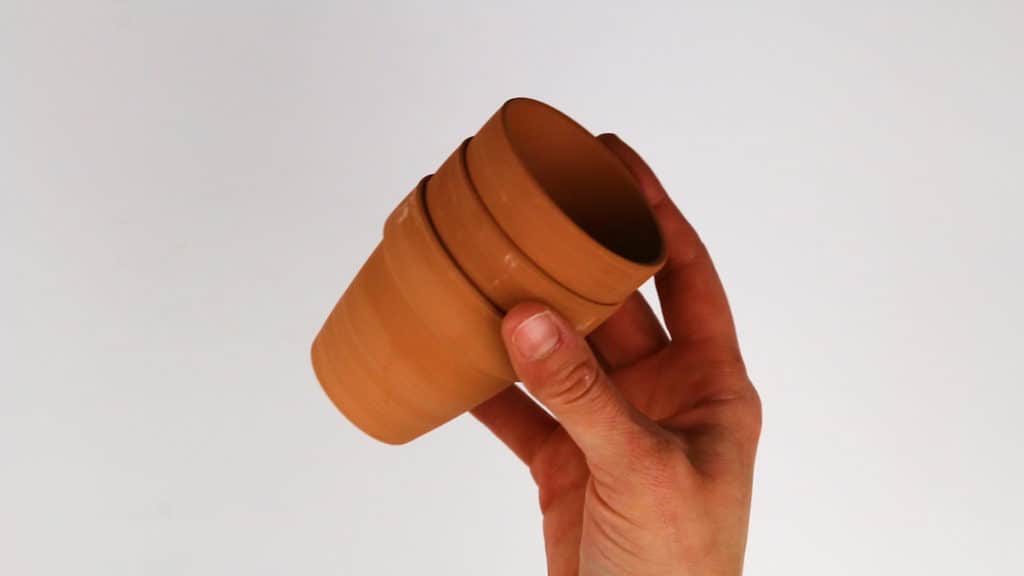
Start by taking all the mini clay pots that you will need.
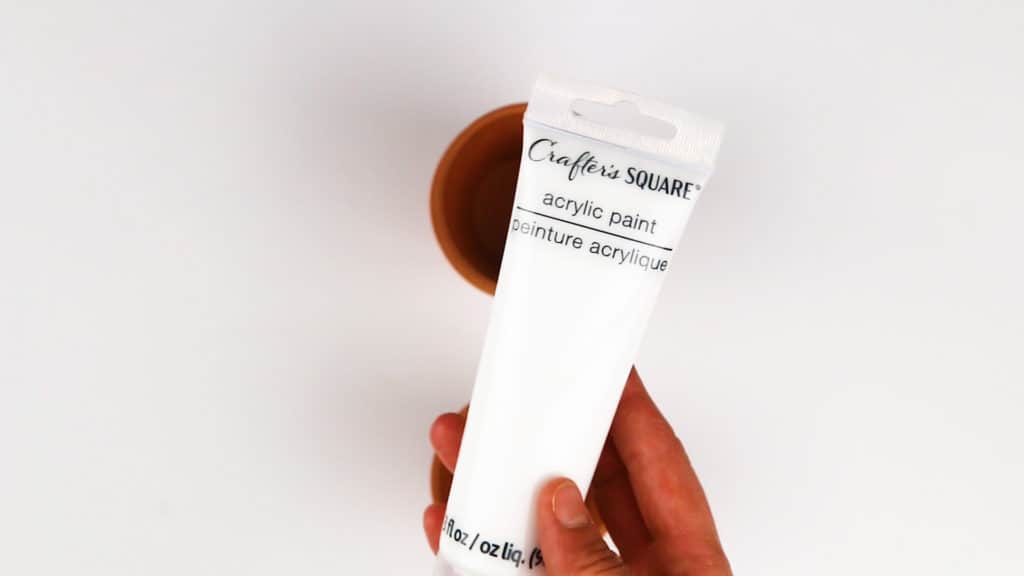
I used this acrylic paint I found at dollar tree for this project to make it a full dollar tree only project. But any white paint will do
I suggest using a sponge brush for this project because it gives that really brushed look and add about a quarter size of paint to the brush.
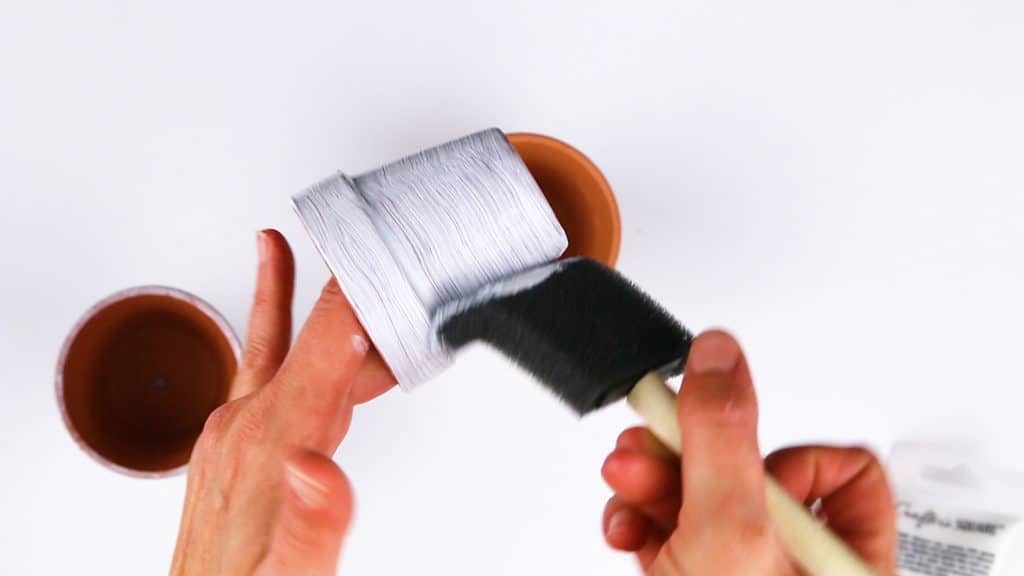
Start painting your mini clay pots. The quarter size amount of paint is good for one pot. No need to get the inside or bottom of the pots. Paint all the pots you are needing and set aside.
Creating the Place Card Holder
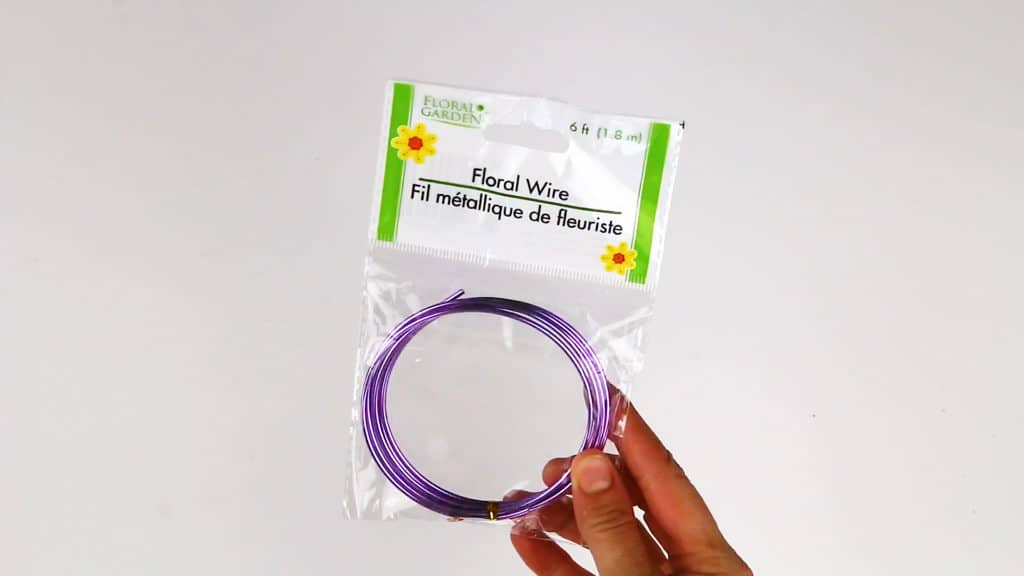
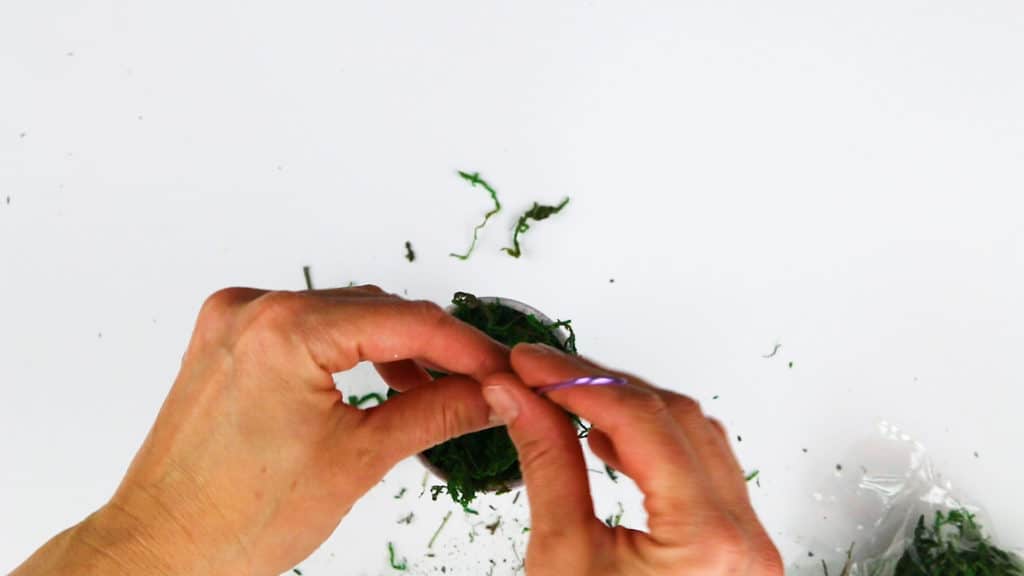
Now take your floral wire and take it out of the package and start straightening it out.
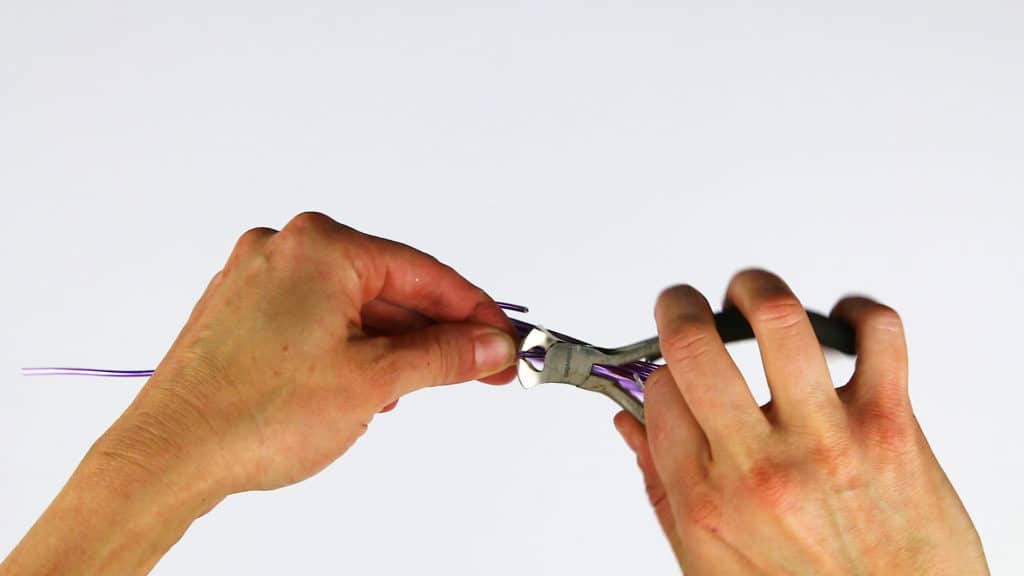
Take some wire cutters and cut about 6 inches.
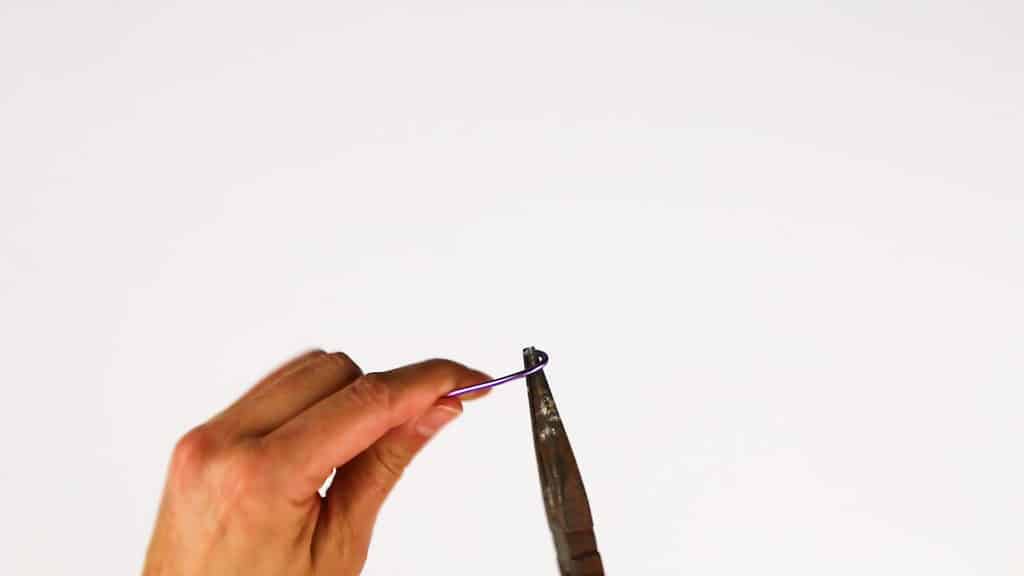
If you have them take some needle noise pliers and grab one end of the wire and twist into a circle. You can also just do this with your fingers, it just might not be as tight.
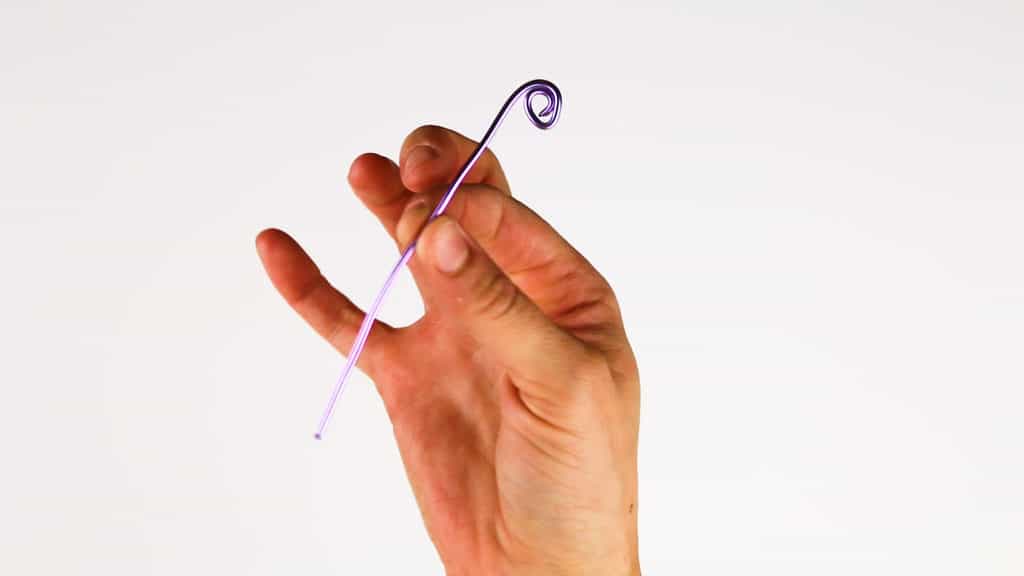
After you twist it it should look something like this. This is where you will stick your name or food tag in.
Filling and Decorating the Clay Pots
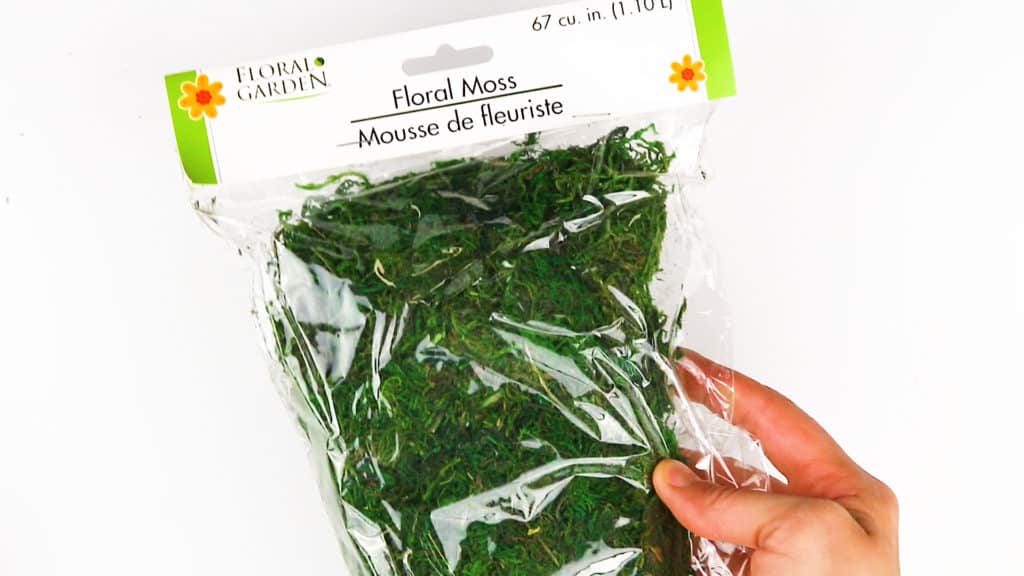
Have your floral moss handy
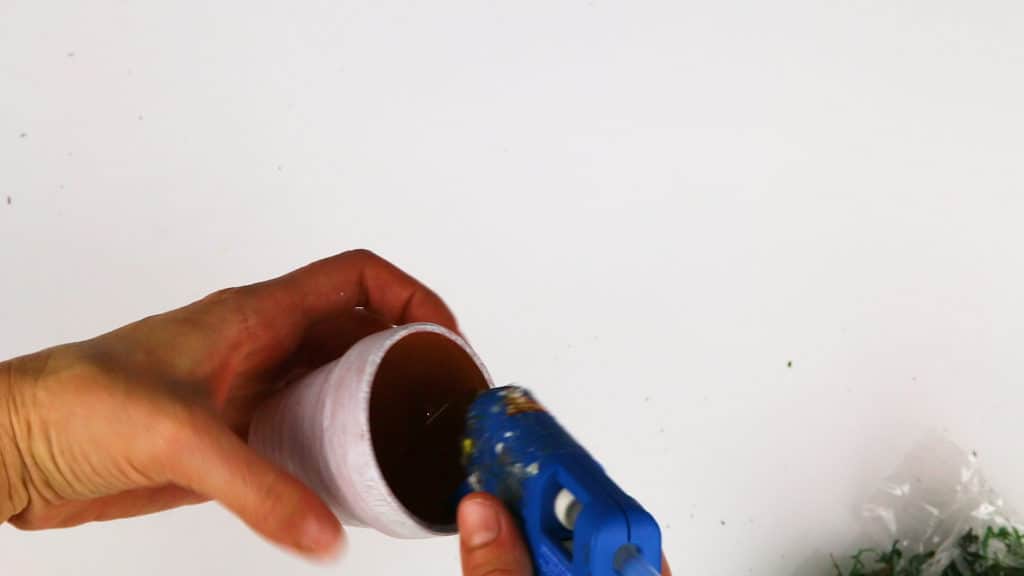
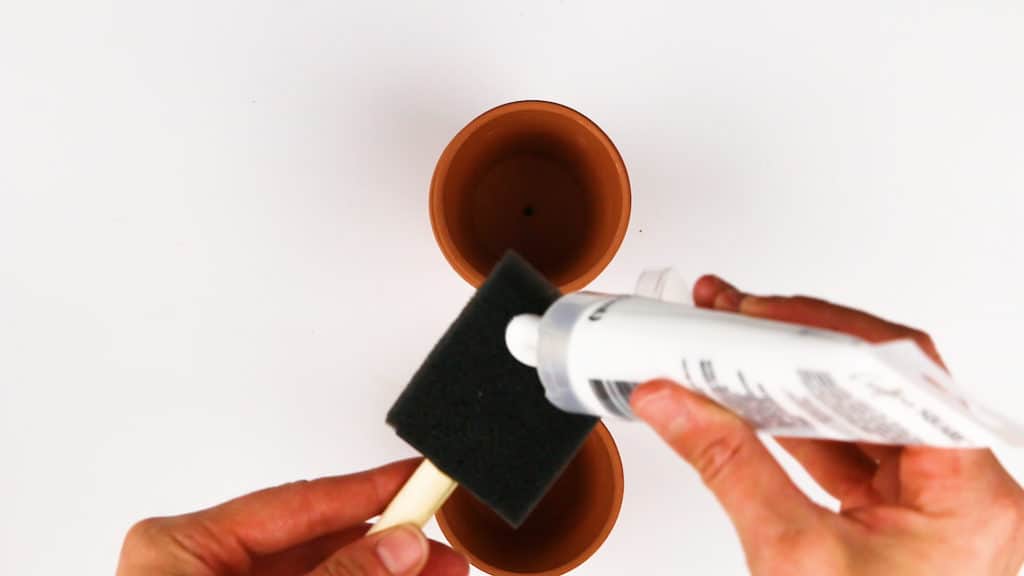
Take one mini clay pot and put some hot glue down the sides of the inside of the pot.
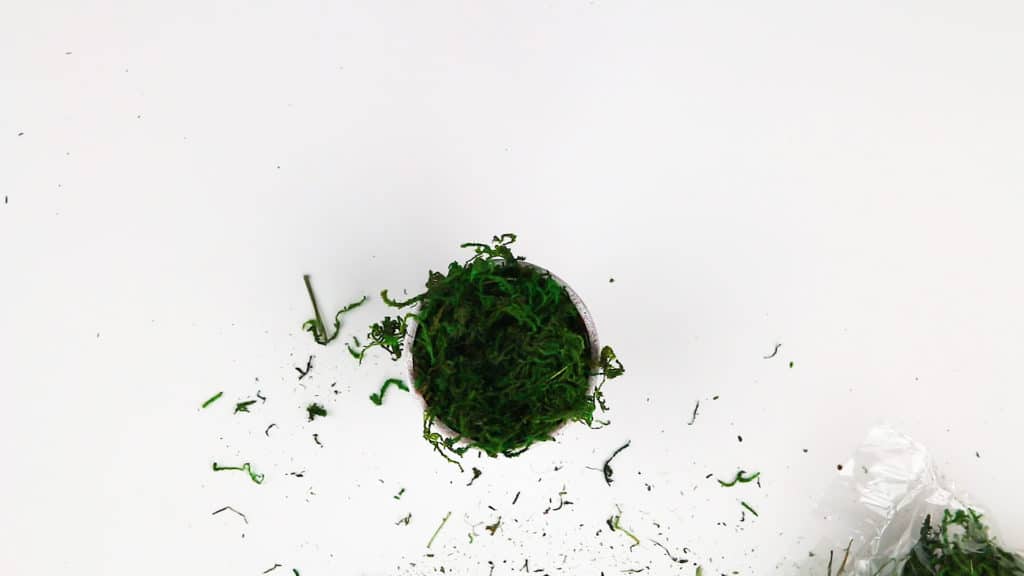
Stuff the pot with the moss sticking it to the sides of the pots. You can add more hot glue and/or moss to give it the desired look you want.
Take your twist floral wire and stick it down the middle of the mossed pot. You can put a dab of hot glue on the end if you want. I lined mine up where the end of the wire went in the hole at the bottom of the pot to help it stay in place.
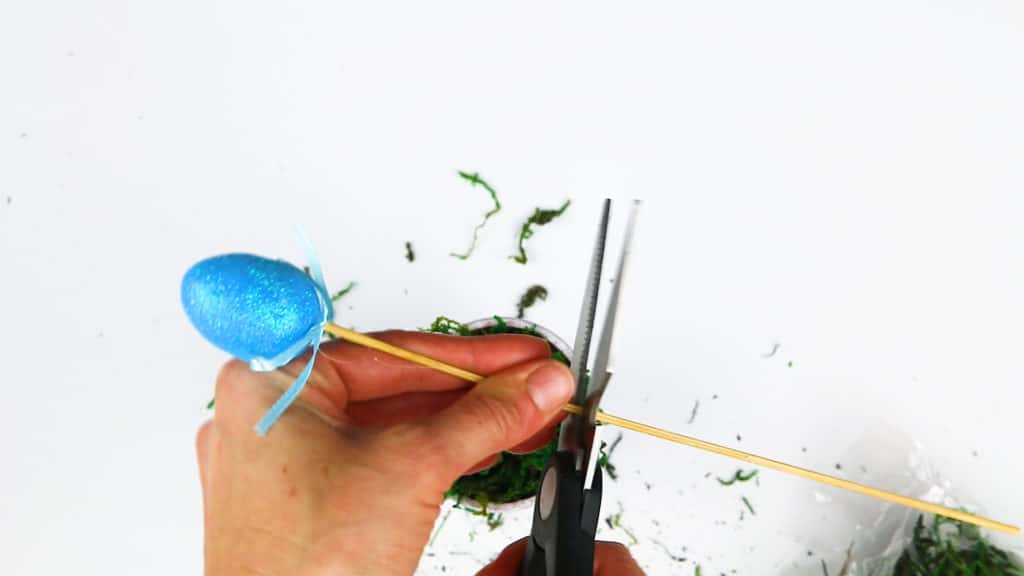
Take 2 of your eggs on a stick and cut them down to the desired length you wan them sticking out of the pot.
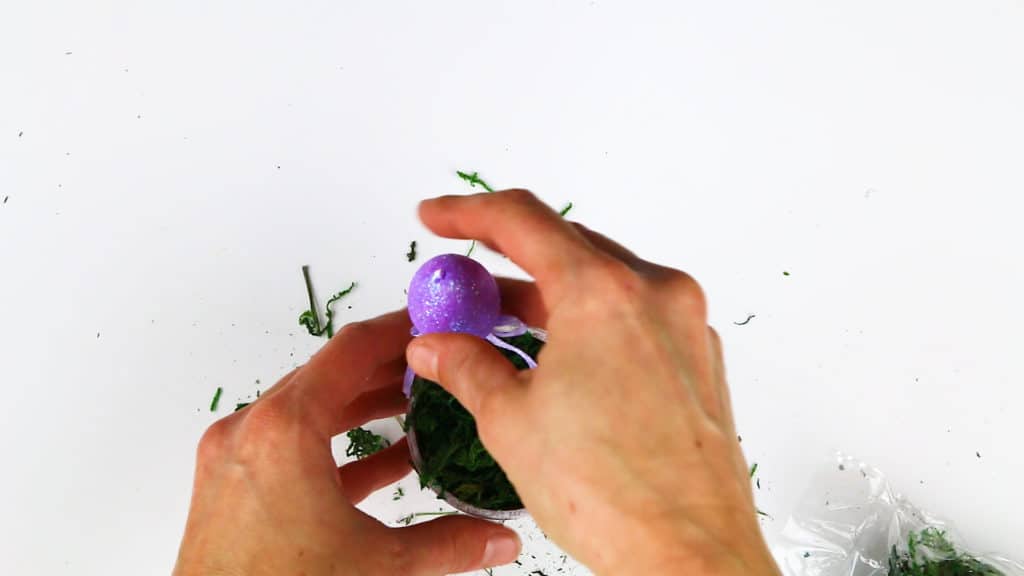
Stick them both inside of the pot. I put mine on opposite sides kind of tilted to the side.

Take one of the loose eggs and pull the string out of the bottom and add hot glue to one side of the egg

Then stick in down into the moss and hold it there for a little bit to make sure it sticks
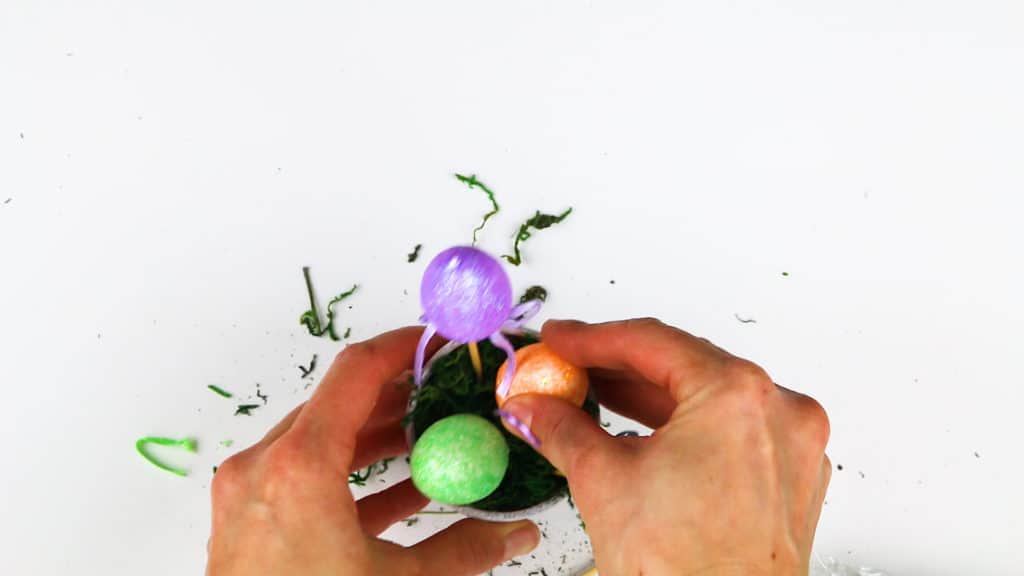
Do the same with a second egg.

And that is it and you are done. Add the moss and eggs to all of the mini clay pots
Tips for this Project
- If you already have white paint at home skip buying this paint. I have tons of paint, but wanted to show that you can get all your supplies from DT. A good chalk paint would work good for this project too.
- If you can’t find the “egg picks” the loose eggs have a hole in the bottom and you could buy some bamboo skewers from DT and put those inside the eggs.
- I prefer the really green moss for this project, but DT sales a variety of moss
- If you can’t find the mini clay pots DT has these cute white buckets in the wedding section of the store
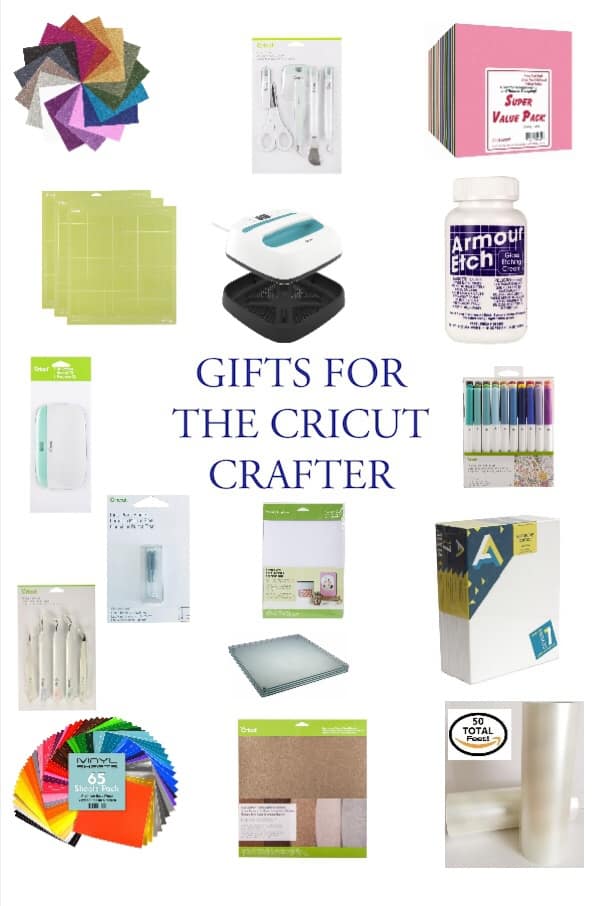
- I used my Cricut to cut and and write my tags for this project
Want More Craft Ideas?
Cricut Personalized Slate Coasters
Cricut Dollar Tree Valentines
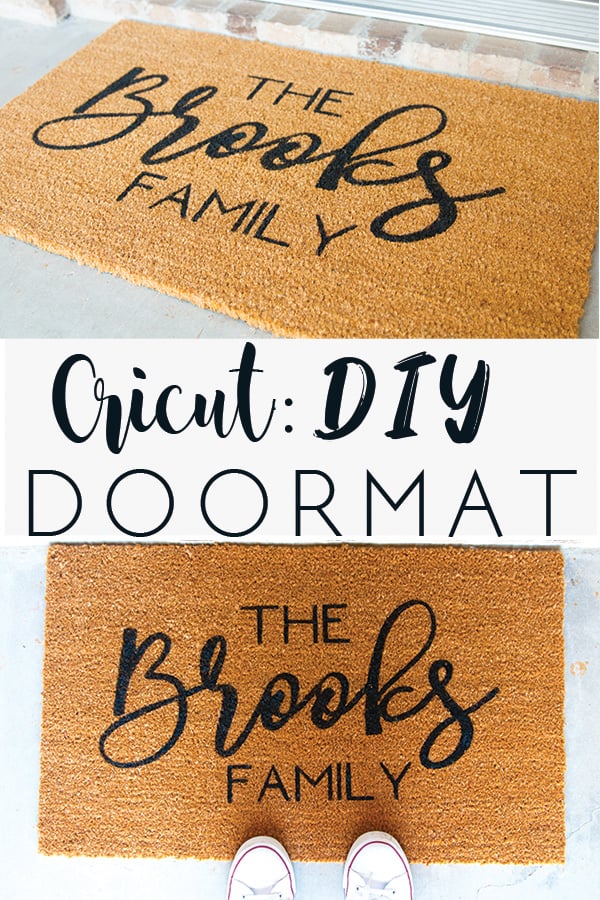
Cricut DIY Doormat
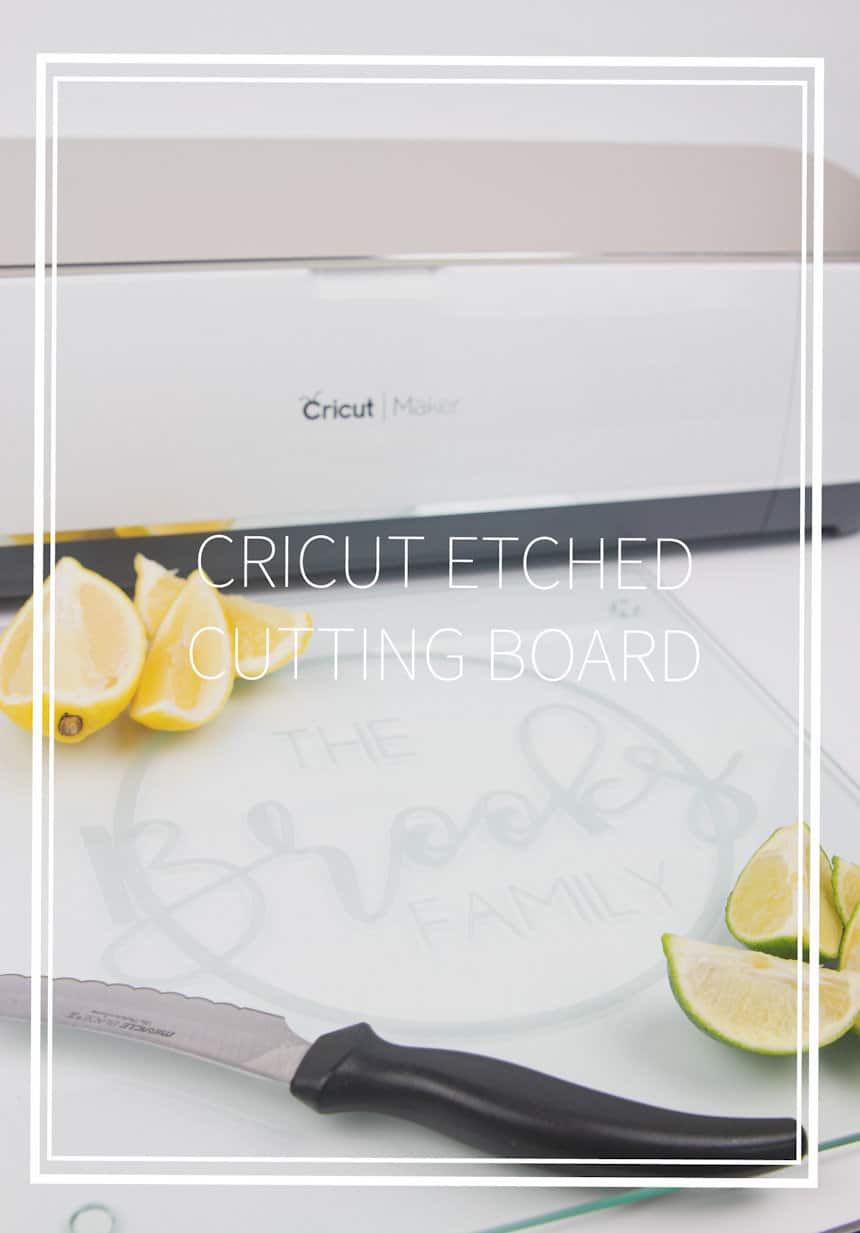
Etched Slate Cheeseboard
Or check out all my craft posts and get to making today!